The Legend of the Book of Yum

kbb_book_of_yum

When I went away to university it was the first time I had been away from home. I wasn’t sure what to expect: would I love the freedom? Would I totally freak out? Either way I knew that I was going to be really homesick.

My solution was The Book of Yum and it started out as kind of a joke between my university friends and I.

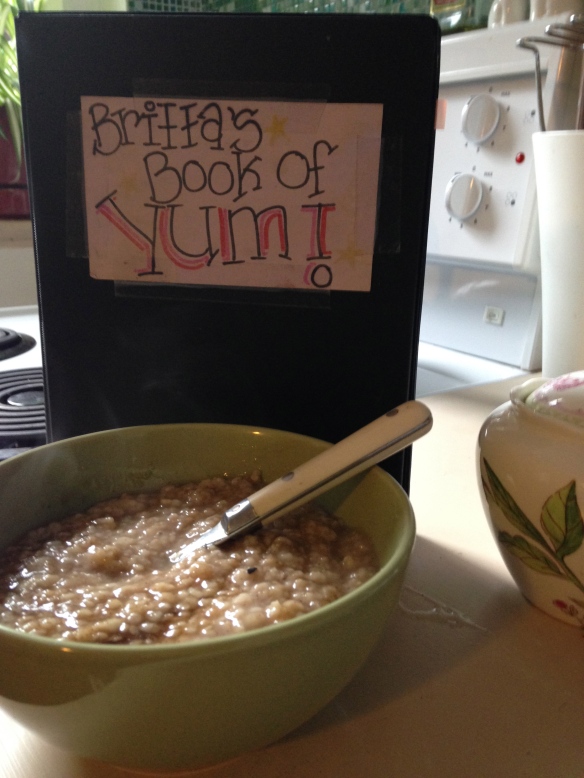
In anticipation of missing my mom’s cooking, I painstakingly wrote out some of our family’s favorite recipes in a small black binder, organized using homemade construction paper dividers. Also included were some helpful cooking hints for myself on how to make the basics; for example, tips on making rice nice and fluffy, and how to make your basic white sauce. I was reluctant to call it a recipe binder because it felt more like a compendium of my mother’s advice, and a piece of my family’s culinary history. So I called it “The Book of Yum”, made some dorky labels for it and took it to college with me.

Anyone who has had roommates knows that it’s hard to keep a secret from them, so it didn’t take long before people started to take note of the little binder I was always toting into the kitchen with me. Maybe it was the colorful labels, or the fact that no one I knew had completed a similar project.

Mostly I think The Book of Yum caught people’s attention because I was one of the few people in my group of friends that could actually cook. And bake.

This was the start of a whole new college culinary adventure. While a lot of kids were out partying you could often find me at home with my roommates attempting to develop a garnish for fish, bake a pie from scratch, or experiment with a foreign food. (Ok, maybe I found some time for partying too.)

In some ways, it was my college years that fostered my love of cooking and food. I tried every kind of food, in every kind of restaurant in town and I always had a hungry mouth nearby willing to try whatever it was I was making that day. It was a time of firsts: my first pastry dough, my first experiment with phyllo, and my first roast.

It was also during these years that I discovered how cooking for others felt like a gift more to myself than a gift for them. Nothing gave me more pleasure than watching my friends enjoy something I had created and nothing made me appreciate food more than the act of making it myself.

More than anything, though, The Book of Yum was a way for me to honor my family; both my love for them and the traditions that we build and maintain.

I still have it too, even though it’s expanded to accommodate my expanded culinary horizons. Even though that little black binder has transformed, it still opens a floodgate of sense memories as soon as I lift the cover. No matter how successful I end up being in my writing career, I’ll still consider one of my favorite books that I’ve written.

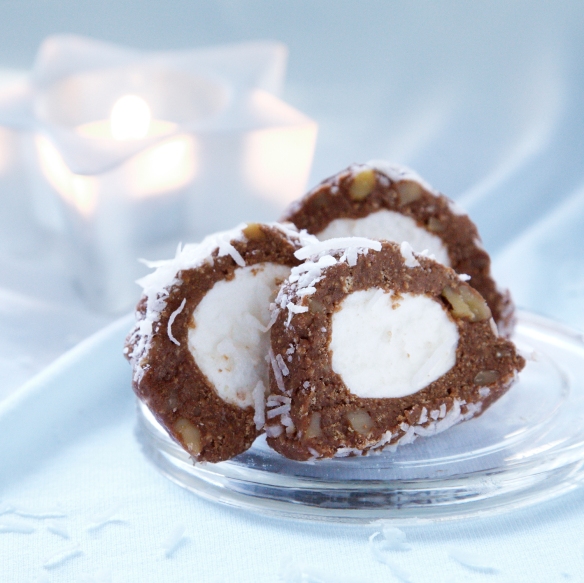
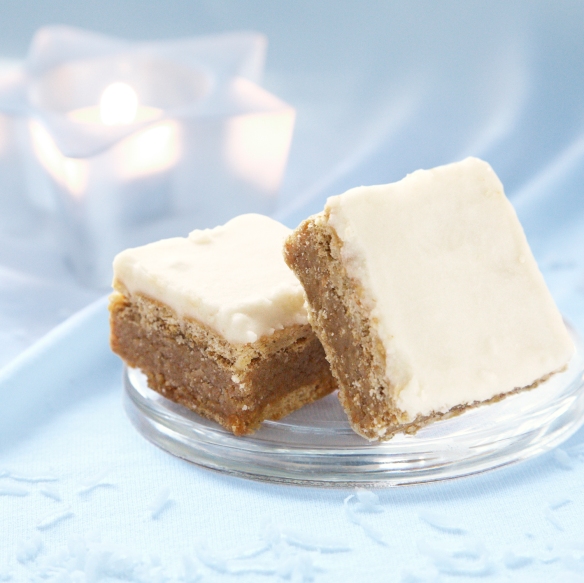
You may not know it, but you’ve read part of The Book of Yum too! If you were looking at it now, you’d recognize these Chocolate Brownies, these Butterscotch Brownies, these Banana Muffins, these Chocolate Banana Cookies, these Sugar Cookies, these Maple Syrup Muffins, this Apple Pie and this Zucchini Bread. I hope you enjoyed them as much as my family and friends have!

KBwB-BFlower-50I’d love to hear about your own recipe collection. Which childhood recipes do you still include in your repertoire? Email me at keepingbusyb@gmail.com or comment below. I’d love to try one out!

I try out a new recipe every two weeks or so and blog about the results, so if you need even more baking inspiration, you can find the complete list in alphabetical order here.


Your Burning Baking Questions for B

kbb-in-the-kitchen

If you’re new to this blog, welcome! I love meeting new people who love baking as much as I do.

If you’ve been following for awhile, you’ll know that in addition to having a giant sweet-tooth, part of my passion for baking lies comes from how I cope with stress. But I get a lot of questions about my favorite recipes, methods and my baking experiences both online and in person, so I thought I’d attempt to answer a few more of them here. Maybe we can even get to know each other a little better!

What was the first thing you ever made? Some of my earliest memories are of helping my mother in the kitchen but the first thing I ever baked all by myself were these chocolate brownies.

Are there any recipes you know off by heart? Yeah, that one! And the one for peanut butter cookies because it’s so freaking easy.

What’s the easiest thing you’ve made? I’d say pretty much all of the stuff I’ve featured on the blog is pretty easy (otherwise I wouldn’t blog about it!) but these peanut butter cookies, this peach cobbler, these minty Nanaimo bars, these butterscotch treats, and these S’mores Squares were among the easiest. Oh! And applesauce, although I don’t think that really counts as “baking”.

What’s the most difficult thing you’ve made? Making your own pastry dough like I describe here is pretty labor-intensive. If you’ve never baked anything before, it’s probably not the best recipe to start with but mostly I think it’s just all of the steps that make it intimidating.

Where do you get your inspiration from? I read lots of cookbooks (found here and here), but I also used to collect magazine clippings like crazy. That was kind of getting out of hand so I’ve relegated a lot of my collection onto Pinterest and into my recipe book. I also read a ton of amazing baking blogs run by talented bloggers, all of whom are way better bakers than I am.

Do you only bake for your blog? Yes and no. Mostly I bake for myself, family, friends or co-workers (especially if there’s a special occasion). I enjoy trying new recipes all the time but since I started featuring more of my baking on the blog I’ve made a more concerted effort to vary the kinds of things I make, and the flavors I use. So yes, sometimes I find a new recipe to try out for the blog specifically, but I’m constantly returning to my favorites in between.

Have you ever considered making baked goods on commission? Are you going to open a bakery? I don’t have my food handler’s certificate, or any formal culinary training so probably not. I kind of like the idea of feeding a bunch of people and getting paid for it, though, so I wouldn’t rule it out.

Do you cook as often as you bake? Not as much, although I do like cooking a lot. I don’t often like eating big meals so I’m more of a grazer throughout the day- fresh fruits and veggies, and yogurt. Oh man, yogurt. I usually save my more substantial recipes for other people. Maybe I’ll share one or two on the blog in the future!

What’s the one thing you haven’t baked? I have yet to successfully make meringue, and as of yet I’ve never attempted a soufflé. (It kind of scares me.) I’ve also never made a cheesecake- no particular reason, I just haven’t done it yet!

What is your all-time favorite dessert? There haven’t been many baked goods that I’ve met and haven’t liked, but there’s nothing like a dense, moist carrot cake with cream cheese frosting.

KBwB-BFlower-50

I hope you’ve enjoyed getting the chance to know me a little bit more- now I want to know a little bit more about you! What’s your favorite dessert? What’s the one recipe you’ve always been too intimidated to bake? Leave your answers below, and make sure to link to your favorite recipes on your blog! When it comes to baking, the more the merrier.

Come Fika with Me (Again!)

I can’t believe it’s been a whole year since we last had fika together.

For those of you who are unfamiliar with the term, it’s a Swedish concept not unlike high tea in England. Instead of tea though, we usually serve strong coffee, along with a bite to eat. This could include anything from simple bread and butter, to open-faced sandwiches but traditionally is something sweet. More than just your typical 3 p.m. coffee break, it’s a time to press pause and chat with friends, or to just contemplate the events of the day.

As a baker with a semi-Swedish background, I’ve incorporated fika as much as possible into my regular routine. It’s better for you than you think! Taking the time to sit, relax and focus on your sensory experiences is restorative for your mind and also for your digestive system- having a little bit of food with your coffee can counteract the acidic, sometimes inflammatory, effects that coffee has on your stomach. Plus, I’m kind of a stress baker, so I have to some way of getting rid of all those extra sweets in my cupboard!

Ever since I started writing about my baking back in 2014, I’ve had the wonderful opportunity to share some of my favorite classic recipes with you, as well as new ones that I’ve been longing to try. Last year’s fika was a chance to feature some of my favorites from the blog, and it’s amazing how many more recipes I’ve added to my collection since then.

I even got together with some other bloggers (twice!) to round-up even more recipe inspiration, first focusing on cakes, and then sharing our most-loved cookies.

Last year’s fika also featured a listing of some the cookbooks that grace my shelves. You’d better believe my collection of titles has expanded since then!

If you find the concept of fika as appealing as I do, I hope you’ll join me this year for my second annual fika party. Today’s post is just the first of many goodies this week- I’ll also be sharing a little more about where I get my inspiration, how I develop and test my recipes for the blog, and some of the adventures I’ve had in baking along the way.

For now, though, your only task is to decide what you’re going to have for fika. Here are some of my suggestions from the past year:

These Cranberry-Almond Biscotti are perfect for dunking in your coffee, and they’re gluten-free which makes them good for you. (Kind of?)

Looking to fika but still stuck with the kids? These Peanut Butter and Jelly Cupcakes, or these Rocky Road Sour Cream Brownies are certain to pleasure sweet-tooths of all ages. Just mind any nut allergies, please.

I originally made these Date Pecan Bars for Christmas, but they pair perfectly with any hot drink any time of year, plus they’re super easy to make.

Impress your friends with this minty version of a Nanaimo bar that eliminates your need to bake, although there is some assembly required. (For more no-bake wonders, try these Butterscotch Bars, this Chocolate Roll, this Marshmallow Roll, this Pineapple Log, this Butterscotch Confetti or these S’mores Squares.)

For those of you looking for something a little less sweet, search no further than this surprisingly delicious Zucchini Bread. (You’ll have most people fooled into thinking it’s carrot cake!)

You won’t ever have to choose between sweet and salty flavors again with these addictive Pretzel Shortbread Bars.

The baking on this blog doesn’t stop there. I like to try out a new recipe out every two weeks or so, and you can find all my work archived into the following categories: cakes and pies, cookies, muffins and cupcakes, squares and loaves, and “other” (think lots of fruity surprises, and yummy candy).

And if you’re planning on throwing a festive fika for a crowd, I’ve got tips on how I bake for the masses here.

Even if you’re not a baker and you just enjoy baking, I hope you’ll join me for fika this week. We may not know each other but we’ve bonded already over our love of food, and it’s always a good excuse to kick back, relax, and enjoy some great company. Thanks for joining me!

KBwB-BFlower-50

Do you fika, or have you incorporated a particular aspect of it into your everyday life? Email me at keepingbusyb@gmail.com and tell me everything- including how you like your coffee.

Or maybe you want to join in on the party too so leave your comments below along with a link to your favorite recipe, or one of the best featured on your blog! The more the merrier!

Baking with B: Rocky Road Sour Cream Brownies

_mg_0826

I confess I used to be one of those people that scoffed at the idea Valentine’s Day. Like those other haters, I believed it was too commercialized, and I resented feeling excluded all of those years I was single on February 14.

As I’ve gotten older and found it more difficult to keep up with all of my personal relationships, I’m starting to realize those greeting card companies might be onto something. There just aren’t a lot of opportunities for romance amidst today’s hustle and bustle unless you make the time for it. Sure, ideally you’d like to show your partner your appreciation every day, but now I think there’s something to be said for putting aside a day once a year for doing something special.

That’s why I’m starting to think Valentine’s Day is really for those in long-term relationships- those relationships that are filled with chores and kids and bills and all those other wonderful things life throws your way as an adult. Those couples need a day like this. They need a way to make things extra-special.

Kind of like these brownies. My chocolate brownies are kind of a staple in my household, and yet when do I ever get the opportunity to jazz them up a little? Valentine’s Day seemed like the perfect excuse to bake this ooey-gooey, junked-up version. The result? A brownie that’s perfect for your favorite chocoholic, or for anyone that you want to feel special.

Rocky Road Sour Cream Brownies (makes 25)

Brownie Base:

1/2 c. butter, melted

1 c. sugar

1/2 c. flour

1/3 c. cocoa

1/4 tsp baking powder

1/4 tsp salt

1/2 c. sour cream

Rocky Road Topping:

1/2 c. milk or semi-sweet chocolate chips

1/2 c. mini marshmallows

1/2 c. slivered almonds

Preheat oven to 350F. In a medium-sized bowl, cream together butter, sugar and vanilla. Beat in eggs one at a time until frothy, then use a spoon to add sour cream and mix well. In a separate bowl, combine flour, cocoa, baking powder and salt. Stir dry ingredients into wet ingredients until fully combined. Bake in a greased 8-inch pan for approximately 35 minutes.

Remove brownies from oven and sprinkle chocolate chips, marshmallows and almonds (in that order) over top, taking care to distribute evenly. Return to the oven and bake for 5-10 minutes more, or until marshmallows get puffy and golden. Let the brownies cool at least 10-15 minutes before cutting.

B’s Tip: The sour cream brownie base makes these treats really soft at first, so it’s based to wait until brownies are just about cool for the cleanest, neatest cuts. But who am I kidding? Chocolate is chocolate, and these taste good pretty much any which way.

Happy baking!

B

KBwB-Flower-50Baking with B appears every other Monday on the Keeping Busy with B Blog. Find out why I like baking so much here. For more of my baking, click here. And for even more recipe inspiration, check out my Pinterest full of food eye candy that will have you licking your computer. Promise.

Baking with B: Andi’s Gluten-Free Cranberry Almond Biscotti

19cranorangebisc-final

Andi is a neighbor of mine and one of the people that I admire most in this world: she carries herself with such poise and grace that it almost makes me envy her; and you’d hate her for how smart, beautiful and accomplished she is except that she’s so kind-hearted you kind of have to love her anyways.

So when I was making my neighbors some goody bags for Christmas, I felt badly for excluding Andi because of her gluten-free diet. She’s always lamenting that she never gets to try any of the things that I make, so I decided it was time to make her something of her own.

Having not ever made biscotti before-combined with being unfamiliar with many of the GF flours out there- made me a little bit nervous. The results were golden and a little bit spicy, but for some reason retained a slightly chewy texture in the middle that was decidedly delicious, but decidedly un-biscotti like. (Psst. Here’s the part where you email me with your gluten-free, biscotti-making advice.)

Still, I liked them enough to try them again and include them in my baking repertoire. The almond flour gives it an even nuttier flavor that’s not too sweet, and it goes perfectly with a strong Italian espresso.

Andi’s Gluten-Free Cranberry Almond Biscotti (makes 12)

(based on a recipe I originally found here)

2 large eggs

1/3 c. honey

zest from one orange

1 1/2 c. almond flour

2 tbsp arrowroot flour

1/2 tsp baking soda

1/4 tsp sea salt

1/2 c. dried cranberries

1/2 almonds, sliced

In a medium bowl, combine eggs, honey and orange zest and beat until frothy. Add flours, baking soda and sea salt to the bowl and mix until a dough forms. Add cranberries and almonds and stir to combine.

Spoon out dough onto a parchment-lined cookie sheet and use fingers to shape it into a long rectangle, approximately 4×12 inches. (B’s Tip: The dough will be sticky, gooey and hard to manipulate so you can always use the back of a spoon that’s been dipped in cold water to help shape your rectangle.) Make sure to leave room on all sides as the dough will spread as it cooks.

Bake dough in oven that’s been preheated to 350F for approximately 20 minutes or until golden. Remove from the oven and let cool for 1 hour. Once cooled, slice your log on a diagonal to get those long, angular biscotti shapes (about 1″ thick). Lay biscotti on their sides and return to oven for an additional 15-20 minutes until crunchy.

B’s Tip: Believe me, it’s hard to wait for the biscotti to cool before slicing them but trust me- they’re much easier to slice if you do and they need that drying-out time to get that crunchy consistency. Make the process go faster by placing your cookie tray on a raised cooling rack to get the air flowing underneath it, and keep them far away from your warm oven!

Happy baking!

B

KBwB-Flower-50Baking with B appears every other Monday on the Keeping Busy with B Blog. Find out why I like baking so much here. For more of my baking, click here. And for even more recipe inspiration, check out my Pinterest full of food eye candy that will have you licking your computer. Promise.

Baking with B: 7 Days of Christmas Treats: Pineapple Log

19bfp7cookies2-cookie6

Sometimes you don’t know how a recipe turns out and you just have to go for it. Vanilla, pineapple and cream cheese don’t necessarily sound like the most appealing flavors individually, but when they come together in this chewy little number the result tastes like piña colada-flavored fudge. It’s more sweet than fruity, and you can’t taste the cream cheese at all.

Just because a recipe turns out surprisingly good doesn’t mean it’s also surprisingly easy. Sometimes these no-bake recipes require following instructions to the letter, so here’s a few words from the wise:

  • Do make sure your cream cheese is at room temperature before even attempting to beat. You may want to try breaking it up in cubes first to make your life easier, or even better, use a beater with a paddle attachment to make the cream cheese light and fluffy.
  • Don’t buy vanilla wafers thinking you can make your own vanilla wafer crumbs as easily as you can with graham crackers. They’re tough to crumble on their own without a food processor, and the recipe requires the crumbs be superfine for the best blending.
  • Do drain the pineapple within an inch of its life. The recipe does not require the extra moisture and adding too much icing sugar to compensate can turn these cookies very sweet, very quickly.
  • Don’t cut your marshmallows without a glass of cold water by your side for rinsing off your scissors. The marshmallows will get sticky and end up gumming up the blades of your scissors when you cut them. (Maybe some brave soul will attempt this recipe with marshmallow fluff and let me know what they think?)

Try this recipe if you dare- and if you want a little taste of the tropical this holiday season, I definitely think it’s worth the risk!

Pineapple Log (makes approximately 48 slices)

4 oz. cream cheese

2 1/2 c. icing sugar

1 c. vanilla wafer crumbs

1/4 tsp salt

1/2 c. crushed pineapple, drained

1/2 c. tiny colored marshmallows, cut into quarters (use scissors)

shredded coconut

Beat cheese until smooth. Add sugar, crumbs, salt and pineapple. After mixing together well, if this seems very soft, work more crumbs or icing sugar into the batter keeping in mind that it won’t get much firmer when chilled. The amount extra that you will need depends on how well you drained the pineapple. Now mix in the marshmallows. Shape into log and roll in shredded coconut. Chill. Slice to serve.

Happy baking!

B

KBwB-Flower-50

Last year I counted down to Christmas by baking seven different types of Christmas cookies as per my favorite Swedish holiday tradition. This year I’m making it a thing, and sharing seven more delicious recipes with you. For more inspiration, you can check out more of my baking here. For even more recipe inspiration check out my Pinterest full of food eye candy that will have you licking your computer. Promise.

Baking with B: 7 Days of Christmas Treats: Marshmallow Roll

19bfp7cookies2-cookie5

I loved making this cookie simply because of the way it looks- the marshmallow inside reminds me of a little snowball and the coconut coating gives this cookie a light dusting of faux snow.

Just because these marshmallow rolls look so sweet doesn’t mean they actually taste that sweet- using unsweetened chocolate gives this recipe a fudgey flavor and the graham cracker crumbs give it a salty undertone (even if you do opt to go without the nuts).

Marshmallow Roll (makes approximately 24 slices)

2 squares of unsweetened chocolate

10 oz. sweetened condensed milk

2 c. graham cracker crumbs

1/2 c. walnuts, finely chopped

large colored marshmallows

coconut

Melt in chocolate in large saucepan over low heat or hot water. Remove from heat. Stir in milk, crumbs and nuts. Divide into 2 portions. On piece of wax paper press out 1 portion 1/4-inch thick. Form into wide enough shape to go around marshmallow. Place various colors of marshmallow end to end and bring up batter to go around, pinching dough to join.

B’s Tip: Do make sure that you’re generous when measuring out the graham cracker crumbs- this dough is incredibly sticky and hard enough to handle as it is! P.S. Wax paper is also a must for easier rolling and clean up.

Coat with coconut. Repeat for other half. Wrap in wax paper. Store in plastic wrap in refrigerator. Cut with knife dipped in water. Clean knife between cuts. Slice thinly to serve.

B’s Tip: These recipe can be stored up for up to a week in an airtight container in the refrigerator. If you can stand it, wait another 24 hours after slicing to try for an even chewier treat.

Happy baking!

B

KBwB-Flower-50

Last year I counted down to Christmas by baking seven different types of Christmas cookies as per my favorite Swedish holiday tradition. This year I’m making it a thing, and sharing seven more delicious recipes with you. For more inspiration, you can check out more of my baking here. For even more recipe inspiration check out my Pinterest full of food eye candy that will have you licking your computer. Promise.

Baking with B: 7 Days of Christmas Treats: Chocolate Roll


19bfp7cookies2-cookie4

Take it from me- there is no way that you can mess this recipe up. It feels like taking everything that tastes sweet and good in your pantry and throwing it all into one fudgey slice of a cookie. The sheer amount of stuff in it makes it tricky to roll-putting it together just feels like throwing lumps of dough onto a pan- but once you’ve molded it into a nice shape, it looks pretty no matter what. I bet this would be a blast to make with kids.

Chocolate Roll (makes approximately 24 slices)

1 c. semisweet chocolate chips

2 tbsp butter or margarine

1 egg, beaten

1 c. icing sugar

1 1/2 c. small colored marshmallows

1/2 c. maraschino cherries, well-drained and quartered

1/2 c. chopped walnuts

coconut for topping

Melt chips and butter in a large heavy saucepan over low heat. Remove from heat. Add beaten egg, icing sugar, marshmallows, cherries and walnuts. Stir to mix. Cool if very warm. Form mixture into a roll. Sprinkle some coconut over countertop, in space big enough to move around to coat with coconut. Wrap in either wax paper or plastic wrap. Chill well before attempting to slice. Slice thinly with clean, sharp knife.

B’s Tip: I ended up using glaçe cherries instead of maraschino cherries and they ended up working just as well because of their ooey-gooey sweetness.

Happy baking!

B

KBwB-Flower-50

Last year I counted down to Christmas by baking seven different types of Christmas cookies as per my favorite Swedish holiday tradition. This year I’m making it a thing, and sharing seven more delicious recipes with you. For more inspiration, you can check out more of my baking here. For even more recipe inspiration check out my Pinterest full of food eye candy that will have you licking your computer. Promise.

Baking with B: 7 Days of Christmas Treats: Midnight Mints

19bfp7cookies2-cookie3

Someone just told me that Nanaimo Bars are a Canadian thing (supposedly they were originally named for the place where they were invented- Nanaimo, B.C.). Am I a bad baker for not knowing this? Or a bad Canadian? Is this actually true? (Someone on the Internets please confirm. I’m dying to know.)

I’ve also read that Nanaimo Bars may also be called Millionaire Bars in the U.K. Is this also true? Are they the same thing?

No matter. I’ve always loved nanaimo bars and I love this minty version even more, especially because it was the one my mom used to make for the holidays when I was younger. Chocolate and mint is definitely a winning combination, which is why these bars win the award for baked goods that flew out of my house the fastest. (Thank goodness for hungry neighbors! They were gone in less than an hour.)

It sparked an interesting conversation among a few of us in the building on which families grew up eating the minty kind, and which families veered towards the more traditional recipe. I think both taste great, but you be the judge. Obviously, in this case, I’m very biased.

Midnight Mints (makes 36)

Bottom Layer

1/2 c. butter or margarine

1/4 c. granulated sugar

5 tbsp cocoa

1 egg, beaten

1 3/4 c. graham cracker crumbs

1/2 c. chopped walnuts

3/4 c. fine coconut


Middle Layer

1/3 c. butter or margarine

3 tbsp milk

1 tsp peppermint flavoring

2 c icing sugar

green food coloring


Top Layer

2/3 c. semisweet chocolate chips

2 tbsp. butter or margarine


To make the bottom layer, combine butter, sugar and cocoa in saucepan. Bring slowly to a boil. Stir in egg to thicken. Remove from heat. Stir in crumbs, nuts and coconut. Pack very firmly into greased 9×9-inch pan.

To make the middle layer, combine butter, milk, flavoring and icing sugar in bowl. Beat together well. Tint a pretty green. Spread over first layer.

To make the top layer, melt chocolate chips and butter in saucepan over low heat or hot water. Spread over second layer. Chill and store covered in refrigerator. This will keep well and will also freeze well. Cut into squares.

B’s Tip: These bars keep up to a week in the fridge but are probably best eaten within 2-3 days (if there’s any leftover!)

Happy baking!

B

KBwB-Flower-50

Last year I counted down to Christmas by baking seven different types of Christmas cookies as per my favorite Swedish holiday tradition. This year I’m making it a thing, and sharing seven more delicious recipes with you. For more inspiration, you can check out more of my baking here. For even more recipe inspiration check out my Pinterest full of food eye candy that will have you licking your computer. Promise.

Baking with B: 7 Days of Christmas Treats: Butterscotch Bars

19bfp7cookies2-cookie2

Do you find yourself scrambling to figure out what to make leading up to the Christmas holidays? Me too. It’s not so much a mater of not knowing what to serve- it’s having to pick and choose! There are so many tasty ideas for holiday foods out there- but what really gets me going is all that Christmas baking.

Part of my background is Swedish so holiday baking is a huge must in our family. It’s a tradition every year around Christmastime to bake seven different kinds of cookies. Why this is a tradition I have no idea but I can’t complain- I love to bake and I love to eat, so everybody wins as far as I’m concerned!

As we begin our countdown to Christmas, I’ll be sharing seven of some of my favorite cookie recipes so that you can get some ideas on what to bring- and what to eat- at your upcoming holiday dinner.

First up are these nummy butterscotch bars which I’m convinced should be a staple in every baker’s repertoire not just for the holidays, but all year round. Definitely a crowd-pleaser!

Butterscotch Bars (makes 36)

Bottom Layer:

whole graham crackers


Middle Layer:

3/4 c. butter or margarine

2/3 c. brown sugar, packed

1/2 c. milk

1 tsp. vanilla

1 1/4 c. graham cracker crumbs


Top Layer:

1 1/2 c. icing sugar

3 tbsp butter or margarine

1 1/2 tbsp water

1/2 tsp vanilla

Line ungreased 9×9-inch pan with whole graham crackers, trimming to fit. Combine butter, sugar, milk and vanilla in large saucepan. Bring to boil and simmer for 5 minutes. Remove from heat and stir in crumbs before pouring over crackers in the pan. Cover with layer of whole crackers, trimming to fit.

While the squares are cooling, beat together ingredients for icing in a small bowl. Add more water or icing sugar until mixture is spreadable, not runny. Use to ice squares once fully cooled. Cut into 36 squares and enjoy!

B’s Tip: This recipe keeps up to one week in the fridge and tastes even better once you’ve let it sit for a couple of days.

Happy baking!

B

KBwB-Flower-50

Last year I counted down to Christmas by baking seven different types of Christmas cookies as per my favorite Swedish holiday tradition. This year I’m making it a thing, and sharing seven more delicious recipes with you. For more inspiration, you can check out more of my baking here. For even more recipe inspiration check out my Pinterest full of food eye candy that will have you licking your computer. Promise.