Baking with B: Ryan’s Cookies and Cream Ice Cream Cake

KBB_baking_ice_cream_cakeI was all set on baking Ryan a cake for his birthday as a surprise after he confessed to me he hadn’t had birthday cake in years, and I quizzed everyone who would listen about their favorite kinds of cake so I would know what kind to bake.

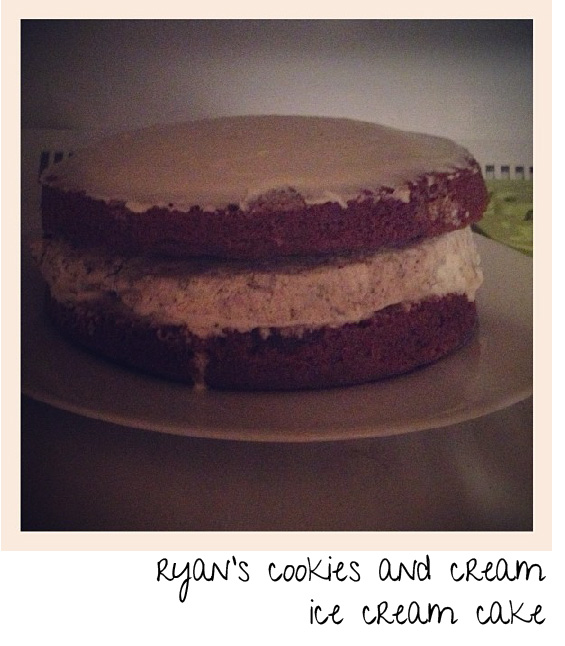
Wouldn’t you know that two hours before he was due to arrive Ryan announced that his dream birthday cake would be an ice cream cake, and so I moved hell and high water to make up this ice cream cake recipe at record speed. Cookies and cream is his favorite flavor, and so that is what he got, although if it had been my birthday I would have requested chocolate chip cookie dough.

Not that I’m asking you to make a cake for my birthday or anything. Ahem.

Ryan’s Cookies and Cream Ice Cream Cake (serves 8)

I’m not sure how they make real ice cream cakes out in real ice cream cake land, but I made the ice cream layer myself by scooping the softened ice cream into a disposable aluminum pan, smoothing it out with the back of my scoop, and letting it harden while I baked the cake layers. I normally don’t cook with disposable pans, but this step ensured all of my layers were the same size, and allowed me to pop out the ice cream layer without much fuss.

To make the cake:

1 1/3 c. all-purpose flour

2 tbsp unsweetened cocoa

1 tbsp baking powder

3/4 c. unsalted butter, softened

generous 3/4 c. sugar

3 eggs, beaten

1 tsp vanilla extract

2 tbsp milk

Preheat the oven to 350F. Grease two 8-inch layer cake pans and line the bottoms with parchment paper. Sift the flour, cocoa and baking powder into a large bowl and add the butter, sugar, eggs and vanilla extract. Beat well until the mixture is smooth, then stir in the milk.

Divide the batter between the prepared pans and smooth level. Bake in the preheated oven for 25-30 minutes, or until golden brown and firm to the touch. Let cool in the pans for 2-3 minutes, then turn out onto a wire rack to cool completely.

Construct your cake by popping out ice cream layer from its pan and sandwiching between the two layers. You may want to secure the layers by spreading a thin layer of icing on the cake layers before sandwiching. Top with your favorite frosting and freeze immediately. Let stand a few minutes before serving in order to cut the cake more easily.

KBwB-Flower-50

I don’t always like to endorse particular brands or products on the blog, but I do like promoting small businesses and I swear without the pint of cookies and cream ice cream from Ed’s Real Scoop my cake wouldn’t have gone over half as well! If you’re in the Toronto area, please do check them out. They currently have two great locations in the Leslieville and Beaches neighborhoods. I’m hard pressed to choose a favorite, but if you really twisted my arm I would recommend the Raspberry White Chocolate. You haven’t tasted anything like it.

Happy baking!

B

Baking with B appears every other Monday on the Keeping Busy with B Blog. Find out why I like baking so much here. For more of my baking, click here. And for even more recipe inspiration, check out my Pinterest full of food eye candy that will have you licking your computer. Promise.

Baking with B: Shannon’s Strawberry Cake

Shannon's Strawberry CakeWhen I asked Shannon what kind of cake she’d like for her birthday, she said she’d be happy with anything as long as it was “something with fruit and whipped cream”.

I was only to happy to oblige, and came with up with this summery cake. Even though this is probably best served when the first fresh strawberries come out at the end of June, it still tasted like the promise of sunshine and beautiful weather to come wen we ate it back in January.

Of course, maybe I’m biased because I’m a summer baby (hint, hint). But everyone else in the office enjoyed it, which makes me think it’s a treat to be enjoyed year-round, especially if you like desserts that are light and fruity.

Shannon’s Strawberry Cake (serves 6)

generous 3/4 c. flour

1 stick butter or margarine

rounded 1/2 c. sugar

2 large eggs, beaten

1/4 tsp vanilla extract

2 tbsp apricot jam (or preferred flavour)

1 1/2 c. whipped cream

strawberries for garnish

Grease 2 small layer cake pans. In a medium bowl, sift flour. Cream the butter and sugar until very light and fluffy. Gradually beat in the eggs, blended with the vanilla extract, adding a spoonful of flour with the last amount. Carefully fold in the remaining flour.

Divide the mixture between the two cake pans and bake at 350F for 20-25 minutes or until the cakes are golden brown and spring back when lightly pressed. Remove from the oven, leave to cool for a couple of minutes, then turn out onto a wire rack and let cool completely.

B’s Tip: I didn’t have two pans the same size unfortunately, and ended up making one long sheet cake. It was easy enough to cut it in half in order to make the two layers, but it left the cake with a golden crust on just one side, which I opted to cut off. It worked out okay, but not great, ya know? Desperate times call for desperate measures, but in the end, go with the two pans.

While cakes are cooling, whip up the whipped cream. I macerated one strawberry in the whipped cream that gave it a wonderful fresh flavour and a tiny bit of sugar. You’re totally welcome to do whatever.

When cakes are cool, heat up the jam of your choice. (Apricot is my recommendation, as it’s super-subtle and lets the vanilla-y cake flavour shine through, but switch it up and tells me how it goes!) Spread over top bottom layer of cake. Sandwich second cake on top. Cover with whipped cream and sliced strawberry as garnish.

Obviously, strawberries are super delicious and made this cake super yum, but you could substitute for any fresh summer fruit, or maybe change it up with some pineapple rings and a sprinkle of coconut. Or change up the flavour by omitting the vanilla extract in the cake batter, and cream in instead 2 tbsp finely grated orange or lemon rind in with the butter.

Happy baking!

B

KBwB-Flower-50

Baking with B appears every other Monday on the Keeping Busy with B Blog. Find out why I like baking so much here. For more of my baking, click here. And for even more recipe inspiration, check out my Pinterest full of food eye candy that will have you licking your computer. Promise.


Baking with B: Lucy’s Chocolate Chocolate Cake


KBB_chopped_chocolate

Somehow (somehow!) I was roped into making a birthday cake for one of the office staff.

Okay. So it wasn’t really that hard to convince me. And when my co-worker Lucy requested that her cake could be anything that was “chocolate chocolate” (that is, chocolate cake with chocolate icing), I was totally game.

And don’t even try to tell me that it should be “double chocolate”. She asked for “chocolate chocolate” and I think I delivered.

KBB_baking_chocolate_chocolate_cakeLucy’s Chocolate Chocolate Cake (serves 8)

2 oz./55g semisweet chocolate, chopped

2 tbsp milk

1 1/2 c. all-purpose flour

1 tbsp baking powder

3/4 c. unsalted butter, softened

generous 1/4 c. dark brown sugar

3 eggs, beaten

1 tsp vanilla extract

Filling and Frosting

31/2 oz./100 g semisweet chocolate, chopped

4 tbsp unsalted butter, softened

1 1/2 c. icing sugar

1 tsp vanilla extract

1 tbsp milk

Preheat the oven to 350F. Grease a 9-inch round cake pan and line with parchment paper.

First, take a picture of the chopped chocolate and post it on Instagram just to be a huge tease. When you’re done gloating about how many likes your picture got (you’re welcome), gently heat the chocolate and milk in a saucepan just until melted, without boiling. Remove from heat.

Sift the flour and baking powder together and add the butter, brown sugar, eggs and vanilla extract. Beat well until smooth, then stir in the melted chocolate mixture.

Spoon the batter into pan smooth level. Bake for 50-60 minutes, or until firm to the touch and just beginning to shrink away from the sides of the pan.

Let cool in the pan for 10 minutes, then turn out onto wire racks to finish cooling. When cold, carefully slice the cake horizontally into 2 layers.

B’s Tip: For the love of all that is good, please test all your willpower and do not try to cut the cake before it has cooled! I learned that the hard way- my first round of this cake got totally smooshed.

For the filling and frosting, melt the chocolate with the butter in a small pan over low heat. Remove from the heat and stir in the confectioner’s sugar, vanilla extract, and milk, then beat well until smooth.

Sandwich the cake layers together with half the chocolate mixture, then spread the remainder on top of the cake, swirling with a spatula. Sprinkle with leftover grated chocolate, if desired.

I substituted milk with cream with no difficulties (so sue me, I was all out!) and instead of a layered option I used the extra icing to frosting the sides of the cake as well. The result? A rich, chocolatey cake with a dense, moist texture. It keeps in the fridge wonderfully if you’re making it ahead of time- just remember to cover with tin foil and let rest at room temperature a few minutes before serving.

Lucy said that it was everything she wanted and the rest of the office seemed pleased as punch, too. Considering my first stab at this recipe turned out a disaster, I was pretty happy with the results too. I’m definitely not waiting until Lucy’s next birthday to try this cake again!

Happy baking!

B

KBwB-Flower-50

Baking with B appears every other Monday on the Keeping Busy with B Blog. Find out why I like baking so much here. For more of my baking, click here. And for even more recipe inspiration, check out my Pinterest full of food eye candy that will have you licking your computer. Promise.