Baking with B: S’mores Squares

14BFP-SmoresBars-1500

I have to admit- the other day I was feeling a little nostalgic about the end of summer. There’s something ominous in those cool August nights- a promise of the weather yet to come that somehow serves as a reminder of all the stuff you didn’t get to experience or enjoy over the past season.

And I definitely have not enjoyed the quintessential outdoor dessert, s’mores, in awhile.

S’mores just aren’t the same when you’re not camping, so the next best thing is making your own deconstructed version that come out more homemade chocolate bars instead of gooey treats. Think of all of the possibilities of the places you can take these babies once you get rid of the oozy, marshmallow-y factor- to the park, to the beach, in the car. (Maybe don’t leave them in the direct sunlight.) S’mores lovers fear no more- they are no longer confined to the campfire. You’re welcome.

S’mores Squares (makes 1 9 x 12-1/2-inch sheet or six 2-1/2 x 5-inch bars)

600g (approximately 1-1/2 lbs.) milk chocolate chips, melted

1 pkg graham crackers

2 c. mini marshmallows

Line a 9×12-1/2-inch rimmed baking sheet or 6 small loaf pans (2-1/2×5-inch) with plastic wrap, and cover the bottom with graham crackers to form a layer. (I used a loaf pan to get a thick, dense square). Reserve remaining crackers. Pour the melted chocolate onto the graham cracker layer, and spread until even and smooth. Sprinkle with mini marshmallows and crumble remaining graham crackers off of top. Refrigerate until firm, at least 1 hour. Peel off the plastic wrap and break into pieces to serve. Keeps in the fridge for one week (if you can resist the temptation to eat them!)

If you’re feeling schmancy (like I was), you can experiment with the flavors and the presentation. I toasted my marshmallows ever so slightly before adding them, and I set some of the melted chocolate to drizzle over top. But don’t let me stop you there- add more toppings like your favorite nuts, dried fruit, or shredded coconut if you want to junk it up. Or if you’re a chocolate lover, you may want to try experimenting with different kinds of chocolate, or flavors of candy bars.

Me, I’m a s’mores purist, and I’ll take these squares as is.

Happy baking!

B

KBwB-BFlower-50

Baking with B appears every other Monday on the Keeping Busy with B Blog. Find out why I like baking so much here. For more of my baking, click here. And for even more recipe inspiration, check out my Pinterest full of food eye candy that will have you licking your computer. Promise.

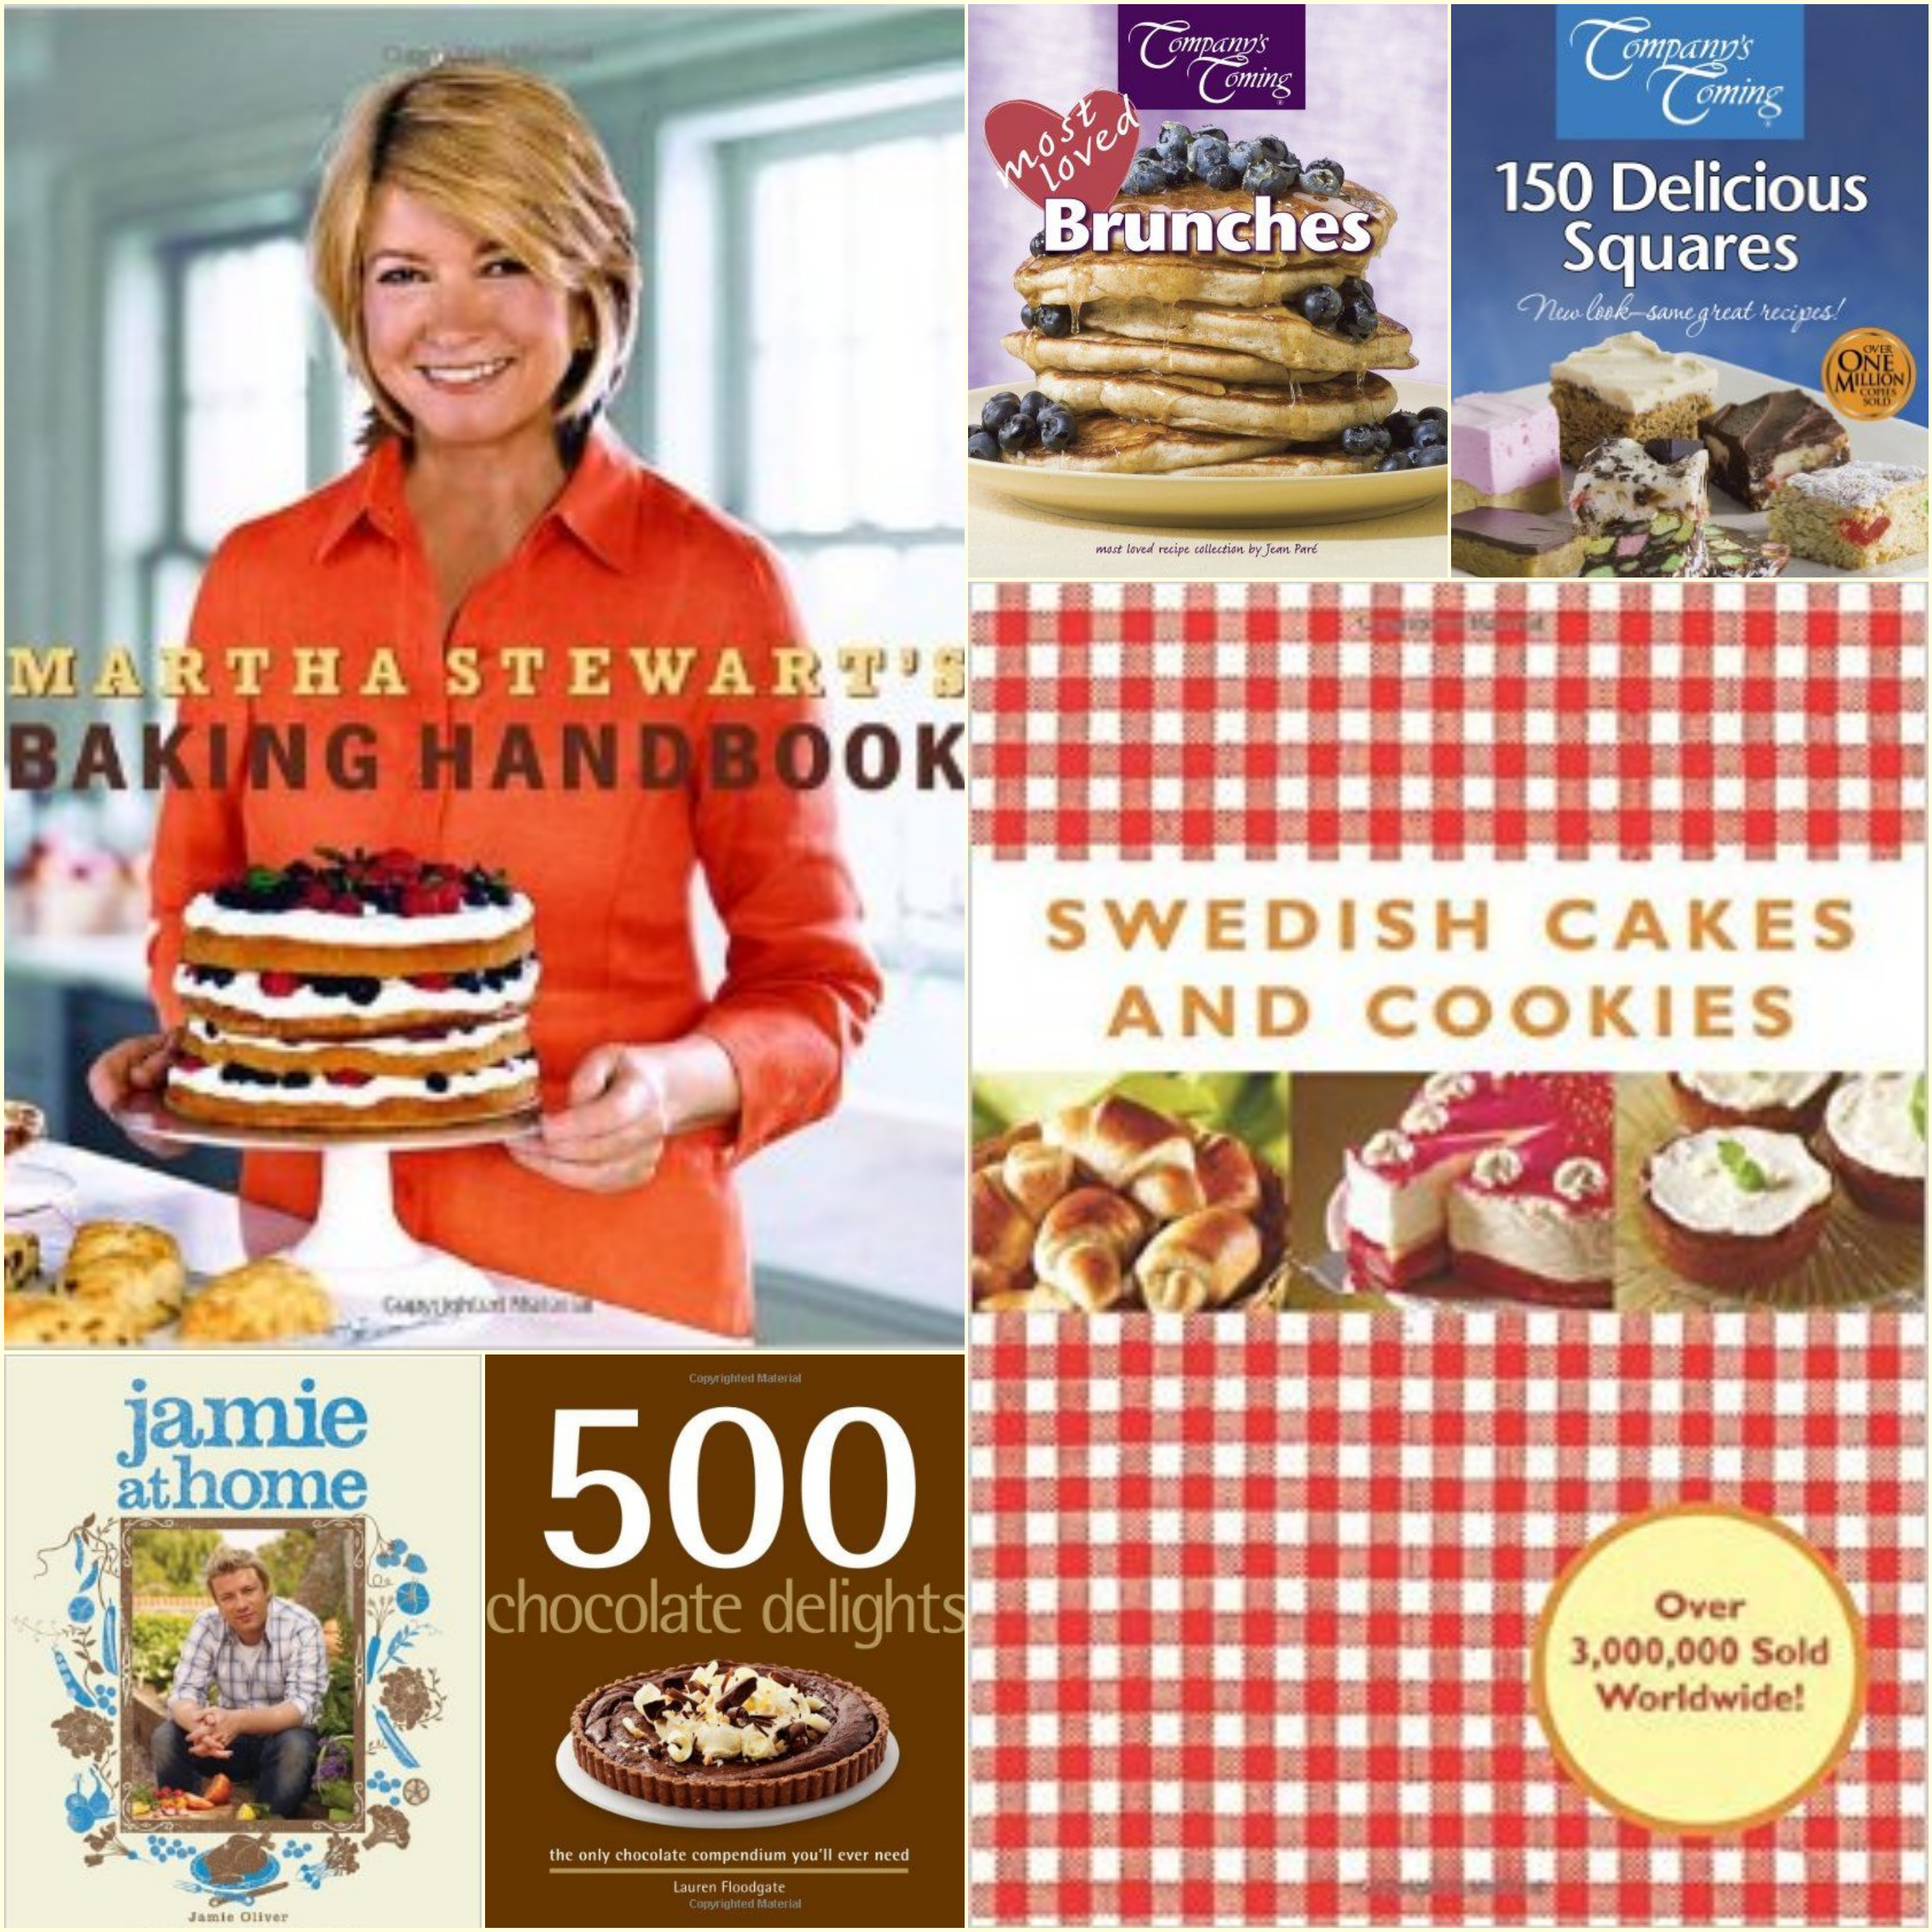
What’s on My Cookbook Shelf

KBB-cookbook-shelf

I didn’t come by my fabulous talent for baking naturally. (Okay, so maybe I’m just an average baker who’s just the teensiest bit obsessed with her own work.) True, I started baking when I was very young but I honestly think it was my love of reading absolutely anything and everything I could get my hands on that made me a better baker. My mother, an actually fabulous baker (no exaggeration), had a secret mission to collect every recipe that was ever written so our kitchen boasted an expansive cookbook collection, and its shelves sagged with even more recipes clipped from magazines and newspapers, waiting to be filed.

Now that I’m an adult (so they tell me) I’ve got my own sizeable recipe collection, although admittedly it’s a little bit more organized. I’ve tried to cut down on a lot of the paper in my life by storing many of my recipes electronically but I still have quite a few cookbooks hidden here and there on my shelves.

In some ways, owning cookbooks is way more fun than having just a collection of typed recipes. Recipes suddenly come into their own being in real technicolor. Photographs, illustrations, text and graphics interplay to create a mouthwatering reading experience. Cookbooks are designed to be pored over and loved, to inspire and entice.

Here’s some that I can’t get enough of:

1) I was so in love with the photography and design of the beautiful Martha Stewart Living Magazine that I was a subscriber for many, many years. During this time I acquired Martha Stewart’s Baking Handbook and still remains an old favorite. Some may knock this homemaking guru for the unrealistic expectations that her elaborate work may set for housewives everywhere, but personally think she’s kind of great. Let her make her crazy cakes. They look gorgeous.

2) and 3) might be familiar to any Canadians in the crowd. Jean Paré got a similar start to Martha Stewart, catering brunches and party foods to small crowds out of her home kitchen until things got busy and Paré turned into a business. Her Company’s Coming line of cookbooks were published to meet her customers’ demands for recipes and the series boasts virtually hundreds of titles. You used to be able to find them in grocery stores everywhere and I still happen to have three of them: Most Loved Brunches (because it’s the best meal of the day), 150 Delicious Squares and Gifts from the Kitchen (not pictured here).

4) My mom is from Sweden so when I think of Sweden I think of baking, and I think of one of my most treasured cookbooks appropriately and succinctly titled Swedish Cakes and Cookies. It’s my absolute go-to guide for all of my Swedish baking traditions. (For example: did you know Swedes make seven different types of cookies at Christmas time? Check out mine from last year here, here, here, here, here, here and here.)

5) So many people would grab 500 Chocolate Delights off of my shelf to read that I eventually just stuck it out in the open so that my guests could peruse it any time they wished. It’s so small and pretty and filled with so many delicious chocolate things that from time to time I find myself gazing at it as well.

6) Jamie Oliver’s cookbook, Jamie at Home, may seem a little out of place in the midst of so many sweet, pretty baking manuals, but I just love this English chef’s conversational tone and this cookbook’s emphasis on good, fresh food (and how to grow it yourself!) It’s been a great resource for growing and cooking with a few herbs and vegetables of my own, so I had to include it here for those who may get their kicks from cooking more than baking.

I’m not one to work my way through a cookbook religiously- I’ll probably never make all of the recipes found in these pages, and the ones I do try will probably not be half as good. Hey, they may not even turn out to be my taste! But just because cookbooks weren’t necessarily meant to be read from cover-to-cover doesn’t make them any less valuable to my book collection, or any less enjoyable.

And the result of reading cookbooks? Delicious food- and that’s often the best part.

KBwB-BFlower-50If you liked books and baking, you’ve come to the right place. (Also, can I be your best friend?) For those of you who are new, here’s where you can find all the books I’ve been reading lately and here’s where you can see what’s been keeping me busy in the kitchen.

Recognize any of the titles on my shelf? What are some of your favorites? I’d love to hear your suggestions at keepingbusyb@gmail.com or spread the love (and the good cooking) by commenting below.


Baking with B: 7 Days of Christmas Cookies: Chocolate Crinkle Cookies

18bfp-7cookies1-092

There used to be this coffee shop down the street from my apartment that used to have not only amazing gelato and lattés, it also had one of my favourite treats ever. For a not-quite-vegan like myself, I was shocked to learn that these babies have no dairy in them whatsoever.

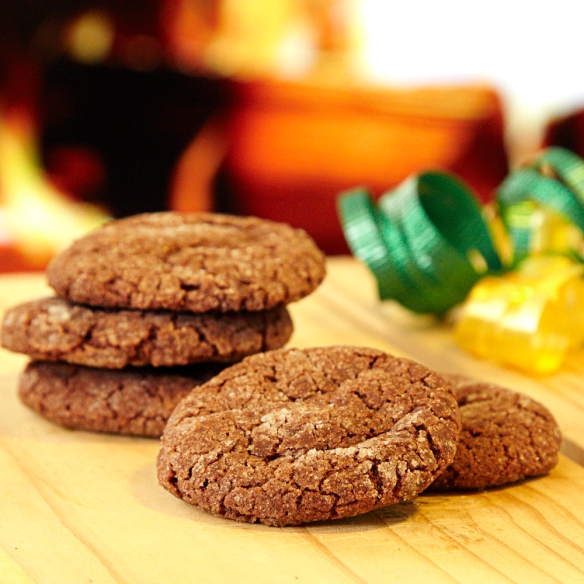
Chocolate crinkle cookies: great around Christmas time, great around any time. They look crunchy because of the way the broken cookie crust outer layer, but the inside is moist and dense and chewy and oh-so-good. Excuse me while I wipe the drool off of my screen.

Buying all these cookies was becoming kind of a problem for me, so I did some searching until I found this recipe from clockworklemon.com. They’re the closest I’ve come to finding a recipe that matched the ones they make in the café so now I can make them at home just to make things a little easier on my wallet.

Vegan-Friendly Chocolate Crinkle Cookies (makes approximately 24 cookies)

3/4 c. sugar

1/3 c. vegetable oil

2 tbsp corn syrup

1 tsp vanilla extract

1/3 c. soy milk

1 tbsp ground flax seeds

powdered sugar and granulated sugar

4 oz (about 1/2 a cup) semisweet chocolate chips, melted

1 1/4 c. + 2 tbsp all purpose flour

2 tbsp cocoa powder

3/4 tsp baking powder

1/4 tsp salt

In a bowl, mix together sugar, oil, corn syrup, vanilla, soy milk, flax seeds, and melted chocolate until smooth. Sift in the flour, cocoa, baking powder and salt. Mix until thick dough forms. Chill the dough in the fridge for 15 minutes. In the meantime, pour granulated sugar onto a plate and powdered sugar on another. When dough is ready, roll into balls approximately the size of a tablespoon and roll them in the granulate sugar, then the powdered sugar. Place cookies on a parchment-lined cookie sheet approximately 2 inches apart and bake at 325F for about 14 minutes. Let cookies cool on tray about five minutes before transferring them to a cooling rack.

B’s Tip: Soy milk not your thing? I substituted for almond milk and it tasted just fine. You could also could try rice milk- let me know what works for you!

If you’re doing something for Santa, why not make these to serve with a glass of milk? Or maybe he’d like them after a light lunch, with his favorite espresso-based drink? Soy lattés are my poison of my choice. I mean his poison of choice. I mean…whatever.

Happy baking!

B

KBwB-Flower-50

I’m counting down Christmas by sharing some of my favourite holiday cookie recipes with you! This is the last day I’m posting my cookie recipes, but for more inspiration, you can check out more of my baking here. For even more recipe inspiration check out my Pinterest full of food eye candy that will have you licking your computer. Promise.
Baking with B: Chocolate and Pear Muffins

Pears in my mouth. All the time. That is what I want. Pears…and chocolate. So when I stumbled across this recipe in my cookbook collection, I just about exploded. How had I not made these before? How have I not shared these with you?

So, here they are, in all their rich, fruity, chocolate-y glory. The cinnamon just makes the whole thing.

You’re welcome.

Chocolate and Pear Muffins (makes 12)
2 c. all-purpose flour

1 1/3 c. chopped, peeled pear

¾ c. brown sugar

3 ½ oz. chopped milk chocolate bar

2 tsp baking powder

¼ tsp ground cinnamon

¼ tsp salt

1 egg

¾ c. buttermilk (or soured milk)

½ c. cooking oil

Combine first seven ingredients in a bowl. Make a well in the centre. Whisk remaining 3 ingredients in small bowl. Add to well. Stir until just moistened. Fill 12 greased muffin cups ¾ full. Bake in 375F oven for about 25 minutes until wooden pick inserted in centre of muffin comes out clean. Let stand in pan for 5 minutes. Remove muffins from pan and place on wire rack to cool.

B’s Tip: Unless you make a habit of having buttermilk in your fridge all the time, you may need to fudge it and make “soured milk” to substitute. Here’s how you do it: Measure 2 ½ tsp white vinegar or lemon juice into a 1 c. liquid measure. Add enough milk to make ¾ c. Stir. Let stand for 5 minutes. I honestly use this trick more often than I use buttermilk and it works like a charm.

Happy baking!

B

KBwB-Flower-50

Baking with B appears every other Monday on the Keeping Busy with B Blog. Find out why I like baking so much here. For more of my baking, click here. And for even more recipe inspiration, check out my Pinterest full of food eye candy that will have you licking your computer. Promise.

Baking with B: Classic Chocolate Cupcakes

KBB_baking_chocolate_cupcakesI used to baby-sit this little girl who used to call these “cups o’cake” which always made me laugh until I realized that the recipe we always used to make these during our times together was actually called “Cups o’Cake”- although I can’t for the life of me remember which cookbook it was from all of these years later. (Help me out here, folks, if you know it.) Needless to say I haven’t baby-sat her in years and years, but these chocolate cupcakes have remained a staple in my baking repertoire because they really are like “cups o’cake”- light, and fluffy, and melt-in-your-mouth. These will not stick around for along, and if you pair these with chocolate icing, all bets are off. Hide your cupcakes. I’m coming over.

Classic Chocolate Cupcakes (makes 12)

¾ c. unsweetened cocoa

1 c. all-purpose flour

1 tsp baking powder

¼ tsp salt

¾ c. unsalted butter, room temperature

1 c. sugar

2 large eggs

1 tsp vanilla

½ c. milk

Preheat oven to 350F. Line 12 muffin cups with paper liners. Sift cocoa, flour, baking powder and salt together. Set aside. In large bowl, beat butter and sugar with electric mixer until light and fluffy. Add eggs one at a time, beating well. Add vanilla. Add half the flour mixture and beat. Add milk and beat. Add the remaining flour mixture and beat for 3 minutes. Spoon batter into muffin cups. Bake for 25 minutes or until a toothpick inserted into the center of a cupcake comes out clean. Cool on rack.

Happy baking!

B

KBwB-Flower-50

Baking with B appears every other Monday on the Keeping Busy with B Blog. Find out why I like baking so much here. For more of my baking, click here. And for even more recipe inspiration, check out my Pinterest full of food eye candy that will have you licking your computer. Promise.  

Wanna know more about making cupcakes en masse? Visit this post to see how I did it. Looking for other delicious cupcake recipes? Click here.

Baking with B: Chocolate Banana Cookies

KBB_baking_chocolate_banana_cookiesYou guys, I have the solution for banana bread boredom- you know, when you use so many overripe bananas you start to get sick of baking with them? (I know right? How could you get sick of banana bread? Or these banana muffins.)

Enter the chocolate banana cookie, the cookie that tastes like chocolate cake, with just a hint of banana flavor. This cake-like cookie even has the stamp of approval from my co-worker Lucy who, to the best of my knowledge, has never consumed a piece of fruit. Like ever.

Try these! They’re easy and yummy and I promise you’ll never feel like you’re in a rut baking with bananas again.

Chocolate Banana Cookies (yields 60)

1 c. margarine or butter, softened

1 c. brown sugar, packed

2 large eggs

1 tsp vanilla

1 c. mashed banana

2 1/2 c. all-purpose flour

1/2 c. cocoa

2 tsp baking powder

1/2 tsp baking soda

2 tsp ground cinnamon

1 1/2 c. milk chocolate chips (optional)

Cream margarine and brown sugar together in large bowl until light and fluffy. Beat in eggs and vanilla until well blended. Add banana. Beat well until mixed.

Combine flour, cocoa, baking powder, baking soda and cinnamon in a medium bowl. Gradually add to banana mixture until well blended.

If desired, add chocolate chips. (This is highly desired.) Stir until evenly distributed. Drop by level tablespoonfuls onto greased cookie sheet. Bake in 350F oven for about 14 minutes.

Happy baking!

B

KBwB-Flower-50

Baking with B appears every other Monday on the Keeping Busy with B Blog. Find out why I like baking so much here. For more of my baking, click here. And for even more recipe inspiration, check out my Pinterest full of food eye candy that will have you licking your computer. Promise.

Baking with B: Double Trouble Chocolate Chip Cookies

Remember how Lucy’s cake was “chocolate chocolate”? Well, these cookies are like her cake’s little brothers- all cakey, and gooey and sprinkled throughout with melt-in-your-mouth-chocolatey-chip-goodness.

Why are they double the trouble, you ask? Because they disappear from your kitchen in double the amount of time of any cookie I have ever made, ever. That’s why after I popped them out of the oven, I grabbed a stack of cookies and a glass of milk and high-tailed it out of there. They may not even make it off of the cooling rack. Seriously. I barely had time to take this picture.

KBB_baking_double_chocolate_chip_cookiesDouble Trouble Chocolate Chip Cookies

1 c. butter

¾ c. brown sugar

¾ c. granulated sugar

2 eggs

1 tsp vanilla

2 ¼ c. all-purpose flour

1/3 c. cocoa

1 tsp. baking soda

2 c. chocolate chips

In large bowl, cream butter with both sugars until light and fluffy. Beat in eggs one at a time. Add vanilla. In smaller bowl, sift flour with cocoa and baking soda. Stir together well. Stir flour mixture into butter mixture until blended. Stir in chocolate chips. Drop batter by teaspoons onto greased and lightly floured or parchment paper-lined cookie sheets. Bake in preheated 375 oven 8-10 minutes. Cool on racks.

Happy baking!

B

KBwB-Flower-50

Baking with B appears every other Monday on the Keeping Busy with B Blog. Find out why I like baking so much here. For more of my baking, click here. And for even more recipe inspiration, check out my Pinterest full of food eye candy that will have you licking your computer. Promise.


Baking with B: Chocolate Chip Cookies

KBB_baking_chocolate_chip_cookiesI am notorious for making batches upon batches of these and then giving them away because I can’t stand to have all of these tasty cookies in my house just waiting to be eaten. I used to make them for parties and have enough left over for goody bags I would shove into my guests’ protesting hands. Christmastime inevitably involves giving away tins of these dipped in chocolate, or covered in almonds, or peppered with peanut butter chips. They’ve been used in care packages, at art shows, as housewarming presents and as going-away presents. It’s because they’re simply the best chocolate chip cookie ever, and I will seriously fight you on that. But my mouth will be full of cookies. Just saying.

Chocolate Chip Cookies (makes 30-34 cookies)

1 1/8 c. flour

1/4 tsp. baking soda

1/2 tsp. salt

1/2 c. butter

1/4 c. brown sugar, plus some for garnish

1/2 c. white sugar

1 egg, beaten

1 tsp. vanilla

½ c. chopped walnuts (optional)

1 c. semisweet chocolate chips

In a medium-sized bowl, cream together butter and sugars. Add vanilla and egg. Beat until creamy. In a separate bowl, sift flour, baking soda and salt. Add into wet ingredients. Fold in chocolate chips. Roll into teaspoon-sized dollops on a greased baking sheet. Bake your cookies at 350F for approximately 10 minutes, or 20 minutes for crispy cookies.

Happy baking!

B

KBwB-Flower-50

Baking with B appears every other Monday on the Keeping Busy with B Blog. Find out why I like baking so much here. For more of my baking, click here. And for even more recipe inspiration, check out my Pinterest full of food eye candy that will have you licking your computer. Promise.

Baking with B: Lucy’s Chocolate Chocolate Cake


KBB_chopped_chocolate

Somehow (somehow!) I was roped into making a birthday cake for one of the office staff.

Okay. So it wasn’t really that hard to convince me. And when my co-worker Lucy requested that her cake could be anything that was “chocolate chocolate” (that is, chocolate cake with chocolate icing), I was totally game.

And don’t even try to tell me that it should be “double chocolate”. She asked for “chocolate chocolate” and I think I delivered.

KBB_baking_chocolate_chocolate_cakeLucy’s Chocolate Chocolate Cake (serves 8)

2 oz./55g semisweet chocolate, chopped

2 tbsp milk

1 1/2 c. all-purpose flour

1 tbsp baking powder

3/4 c. unsalted butter, softened

generous 1/4 c. dark brown sugar

3 eggs, beaten

1 tsp vanilla extract

Filling and Frosting

31/2 oz./100 g semisweet chocolate, chopped

4 tbsp unsalted butter, softened

1 1/2 c. icing sugar

1 tsp vanilla extract

1 tbsp milk

Preheat the oven to 350F. Grease a 9-inch round cake pan and line with parchment paper.

First, take a picture of the chopped chocolate and post it on Instagram just to be a huge tease. When you’re done gloating about how many likes your picture got (you’re welcome), gently heat the chocolate and milk in a saucepan just until melted, without boiling. Remove from heat.

Sift the flour and baking powder together and add the butter, brown sugar, eggs and vanilla extract. Beat well until smooth, then stir in the melted chocolate mixture.

Spoon the batter into pan smooth level. Bake for 50-60 minutes, or until firm to the touch and just beginning to shrink away from the sides of the pan.

Let cool in the pan for 10 minutes, then turn out onto wire racks to finish cooling. When cold, carefully slice the cake horizontally into 2 layers.

B’s Tip: For the love of all that is good, please test all your willpower and do not try to cut the cake before it has cooled! I learned that the hard way- my first round of this cake got totally smooshed.

For the filling and frosting, melt the chocolate with the butter in a small pan over low heat. Remove from the heat and stir in the confectioner’s sugar, vanilla extract, and milk, then beat well until smooth.

Sandwich the cake layers together with half the chocolate mixture, then spread the remainder on top of the cake, swirling with a spatula. Sprinkle with leftover grated chocolate, if desired.

I substituted milk with cream with no difficulties (so sue me, I was all out!) and instead of a layered option I used the extra icing to frosting the sides of the cake as well. The result? A rich, chocolatey cake with a dense, moist texture. It keeps in the fridge wonderfully if you’re making it ahead of time- just remember to cover with tin foil and let rest at room temperature a few minutes before serving.

Lucy said that it was everything she wanted and the rest of the office seemed pleased as punch, too. Considering my first stab at this recipe turned out a disaster, I was pretty happy with the results too. I’m definitely not waiting until Lucy’s next birthday to try this cake again!

Happy baking!

B

KBwB-Flower-50

Baking with B appears every other Monday on the Keeping Busy with B Blog. Find out why I like baking so much here. For more of my baking, click here. And for even more recipe inspiration, check out my Pinterest full of food eye candy that will have you licking your computer. Promise.

Baking with B: Chocolate Brownies

Happy Valentine’s Day to all my readers!

Hey. I love you guys all so much. Thank you for supporting my blog. I’m rewarding you today because it’s a) Valentine’s Day (duh); and b) because it’s coincidentally Friday, which means that this is kind of like the solar eclipse of holidays.

Chocolate Brownies (yields 12)

1/4 c. cocoa powder

1/3 c. butter

1 c. sugar

3/4 c. flour

2 eggs

pinch of salt

In a small saucepan add together cocoa and butter. Begin to melt butter at a low temperature, stirring every so often to combine the melting butter with the cocoa powder. Meanwhile, in a mixing bowl add eggs, sugar, flour and salt. Don’t mix yet! When the butter and cocoa is melted, pour over ingredients into mixing bowl. Stir just enough to combine everything without any lumps, then pour batter into a 9×9-inch into the middle comes out clean. Let cool in pan before cutting into squares.

B’s Tip: I know it’s tempting, but wait until the brownies are completely cool before cutting them! If they’re too hot, the batter will have not set and you’ll end up with a gooey mess that will be delicious, but it won’t be a brownie.

This brownie has a cake-like texture and a chocolatey flavour that isn’t too overhwelming, so it’s perfect for add-ins. You may want to try adding some nuts to the batter, or just smearing with your favourite frosting. Delicious!

Happy baking!

B

KBwB-Flower-50

Baking with B appears every other Monday on the Keeping Busy with B Blog. Find out why I like baking so much here. For more of my baking, click here. And for even more recipe inspiration, check out my Pinterest full of food eye candy that will have you licking your computer. Promise.

Chocolate not your thing? No worries. I’ve got a butterscotch version here. Follow a vegan diet? I’ve got you covered too.