Baking with B: Amy’s Classic Lemon Squares

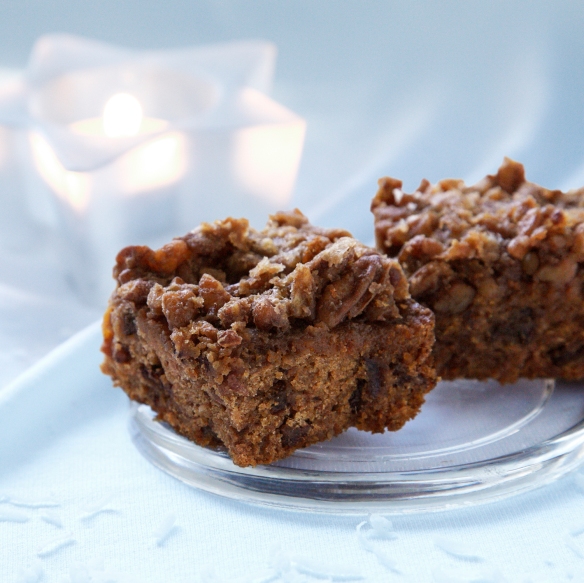
As we get older falling out of touch with old friends is a fact of life. Let’s face it: stuff happens. When we’re burdened with responsibilities we tend to pare life down to its essentials and sometimes it means losing contact with someone who was dear to us. Add in some misunderstandings and well, like I said…s#%! happens.

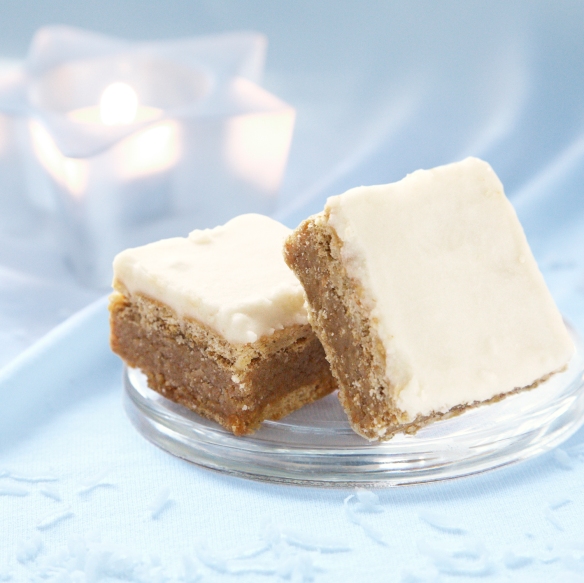
In my life, Amy is one of those people and once upon a time she asked me to make lemon squares for my blog because they’re her favorite. Luckily, a mutual friend of ours had a recipe that was tried, tested and true. We made some for her over the holidays and they were so good I thought I would share them with you as well. They’re super lemony without being too tart, and the buttery crust is surprisingly easy to make.

So cheers to you, Ameballs. We hope you liked your squares.

Amy’s Classic Lemon Squares (makes 36)

For the crust:

2 c. all-purpose flour

1/2 c. powdered sugar

2 tbsp cornstarch

1/4 tsp salt

3/4 c., plus 2 tbsp butter, chilled and cubed

For Filling:

4 eggs, lightly beaten

1 1/2 c. granulated sugar

3 tbsp all-purpose flour

1 tsp lemon zest

3/4 c. lemon juice

1/4 c. cream

powdered sugar (for dusting)

To make the crust, preheat oven to 350F. In a bowl combine flour, sugar, cornstarch and salt. Cut in butter until mixture is crumbly. Press mixture into the bottom of a greased 13x9x2 inch baking pan. Bake 18-20 minutes until the edges are golden.

While the crust is baking, prepare the filling: combine eggs, granulated sugar, flour, lemon zest, lemon juice and cream in a bowl. Remove crust from oven and pour filling over the top. Return to the oven to bake for 15-20 minutes more or until the center is set.

B’s Tip: Test if your lemon curd is set by giving it a little bit of a wiggle, wiggle. If it’s wobbly like Jello, it’s not quite ready.

Cool completely in pan on a wire rack before cutting into squares. Dust with powdered sugar, if desired. Cover and store in the refrigerator (or make them ahead of time and put them in the freezer!)

Baking with B appears every other Monday on the Keeping Busy with B Blog. Find out why I like baking so much here. For more of my baking, click here. And for even more recipe inspiration, check out my Pinterest full of food eye candy that will have you licking your computer. Promise.

This is one of those recipes that I would call a “classic”- one of those down-home, feel-good dishes that everyone should learn how to make! Find more timeless recipes like this click here.

Baking with B: Chocolate Pudding Brownies

Isn’t it awesome when you can take something from your cupboard normally used for one thing and then make something completely different using that same thing?

If you don’t follow, then you obviously haven’t made these Chocolate Pudding Brownies where the secret ingredient is (not surprisingly) chocolate pudding. They’re super-soft and moist and honestly do kind of taste like chocolate pudding- if you bake them right, they have that soft, smooth pudding texture that gives the recipe its name. Apologies to brownie purists everywhere-my favorite brownie recipe is still this one-but for people that are short on time and looking for simple baking solutions, this is definitely one you should add to your roster.

Chocolate Pudding Brownies (makes 25 squares)

6 tbsp butter, softened

2/3 c. sugar

2 eggs

1 tsp. vanilla extract

1/2 c. all-purpose flour

1 box instant chocolate pudding powder (4-serving size)

Preheat oven to 350F. In a medium bowl, cream butter and sugar until smooth before beating in eggs, one at a time. Add vanilla. In a separate bowl, sift together flour and chocolate pudding powder. Combine with wet ingredients just until moistened. Spread evenly in a greased 8×8-inch pan and bake for 30 minutes until pick inserted in center comes out moist, not wet, with batter.

B’s Tip: Depending on how hot or cold your oven runs, you may want to check up on these babies frequently to make sure you don’t over-bake them. They’re still pretty tasty if you do, but the texture comes out kind of gummy and spongy instead of cake-y and moist.

These brownies are so ooey, gooey good that you should wait until they cool before cutting and serving, but if you just can’t wait why not pair one with your favorite ice cream or frozen yogurt for a brownie-licious sundae? Just add whipped cream and chocolate sauce and you’re good to go! Brownie points if you top it with a maraschino cherry. (See what I did there?!)

Happy baking!

B

Baking with B appears every other Monday on the Keeping Busy with B Blog. Find out why I like baking so much here. For more of my baking, click here. And for even more recipe inspiration, check out my Pinterest full of food eye candy that will have you licking your computer. Promise.

Baking with B: Rocky Road Sour Cream Brownies

_mg_0826

I confess I used to be one of those people that scoffed at the idea Valentine’s Day. Like those other haters, I believed it was too commercialized, and I resented feeling excluded all of those years I was single on February 14.

As I’ve gotten older and found it more difficult to keep up with all of my personal relationships, I’m starting to realize those greeting card companies might be onto something. There just aren’t a lot of opportunities for romance amidst today’s hustle and bustle unless you make the time for it. Sure, ideally you’d like to show your partner your appreciation every day, but now I think there’s something to be said for putting aside a day once a year for doing something special.

That’s why I’m starting to think Valentine’s Day is really for those in long-term relationships- those relationships that are filled with chores and kids and bills and all those other wonderful things life throws your way as an adult. Those couples need a day like this. They need a way to make things extra-special.

Kind of like these brownies. My chocolate brownies are kind of a staple in my household, and yet when do I ever get the opportunity to jazz them up a little? Valentine’s Day seemed like the perfect excuse to bake this ooey-gooey, junked-up version. The result? A brownie that’s perfect for your favorite chocoholic, or for anyone that you want to feel special.

Rocky Road Sour Cream Brownies (makes 25)

Brownie Base:

1/2 c. butter, melted

1 c. sugar

1/2 c. flour

1/3 c. cocoa

1/4 tsp baking powder

1/4 tsp salt

1/2 c. sour cream

Rocky Road Topping:

1/2 c. milk or semi-sweet chocolate chips

1/2 c. mini marshmallows

1/2 c. slivered almonds

Preheat oven to 350F. In a medium-sized bowl, cream together butter, sugar and vanilla. Beat in eggs one at a time until frothy, then use a spoon to add sour cream and mix well. In a separate bowl, combine flour, cocoa, baking powder and salt. Stir dry ingredients into wet ingredients until fully combined. Bake in a greased 8-inch pan for approximately 35 minutes.

Remove brownies from oven and sprinkle chocolate chips, marshmallows and almonds (in that order) over top, taking care to distribute evenly. Return to the oven and bake for 5-10 minutes more, or until marshmallows get puffy and golden. Let the brownies cool at least 10-15 minutes before cutting.

B’s Tip: The sour cream brownie base makes these treats really soft at first, so it’s based to wait until brownies are just about cool for the cleanest, neatest cuts. But who am I kidding? Chocolate is chocolate, and these taste good pretty much any which way.

Happy baking!

B

KBwB-Flower-50Baking with B appears every other Monday on the Keeping Busy with B Blog. Find out why I like baking so much here. For more of my baking, click here. And for even more recipe inspiration, check out my Pinterest full of food eye candy that will have you licking your computer. Promise.

Baking with B: 7 Days of Christmas Treats: Date Pecan Bars

19bfp7cookies2-cookie7

One of the worst things you can ask a baker to do is to make a recipe and then leave it alone, but trust me when I say that leaving these bars for a couple of days and giving them some space just might be the best thing you can do for them. The flavor soaks into everything, the topping solidifies and the result is a rich, nutty bar that I literally could not stop eating. (That is, of course, once I gave myself the chance.)

Date Pecan Bars (makes 36)

1 c. dates, chopped

1 tsp. baking soda

1/2 c. butter or margarine

3/4 c. boiling water

1/4 c. dark rum (or 2 tsp., 10 mL rum flavoring plus 1/4 c. water)

1 egg

1/2 c. granulated sugar

1 tsp vanilla

1 1/2 c. all-purpose flour

1 tsp. baking powder

Place dates in large mixing bowl. Sprinkle with baking soda and stir a bit to distribute. Add butter and boiling water. Continue to stir until butter has melted. Add rum, stir and set aside.

In small bowl beat egg, sugar and vanilla together well. Pour into date mixture. Measure in flour and baking powder. Stir well. Spread in greased 9×9-inch pan. Bake in 350F oven for 25 minutes. Remove from oven and spread with topping. Return to oven.

Topping:

1 c. brown sugar, packed

3 tbsp. butter or margarine

3 tbsp cream

1 c. chopped pecans

Crumble all ingredients together in bowl. As soon as you take squares out of the oven, spread over the top and return to oven for 15-20 minutes until golden brown. Cool. Cover with tight plastic or foil and put on an out of the way shelf in your cupboard so it can mellow out for a day or two.

Happy baking!

B

KBwB-Flower-50

Last year I counted down to Christmas by baking seven different types of Christmas cookies as per my favorite Swedish holiday tradition. This year I’m making it a thing, and sharing seven more delicious recipes with you. For more inspiration, you can check out more of my baking here. For even more recipe inspiration check out my Pinterest full of food eye candy that will have you licking your computer. Promise.

Baking with B: 7 Days of Christmas Treats: Butterscotch Bars

19bfp7cookies2-cookie2

Do you find yourself scrambling to figure out what to make leading up to the Christmas holidays? Me too. It’s not so much a mater of not knowing what to serve- it’s having to pick and choose! There are so many tasty ideas for holiday foods out there- but what really gets me going is all that Christmas baking.

Part of my background is Swedish so holiday baking is a huge must in our family. It’s a tradition every year around Christmastime to bake seven different kinds of cookies. Why this is a tradition I have no idea but I can’t complain- I love to bake and I love to eat, so everybody wins as far as I’m concerned!

As we begin our countdown to Christmas, I’ll be sharing seven of some of my favorite cookie recipes so that you can get some ideas on what to bring- and what to eat- at your upcoming holiday dinner.

First up are these nummy butterscotch bars which I’m convinced should be a staple in every baker’s repertoire not just for the holidays, but all year round. Definitely a crowd-pleaser!

Butterscotch Bars (makes 36)

Bottom Layer:

whole graham crackers


Middle Layer:

3/4 c. butter or margarine

2/3 c. brown sugar, packed

1/2 c. milk

1 tsp. vanilla

1 1/4 c. graham cracker crumbs


Top Layer:

1 1/2 c. icing sugar

3 tbsp butter or margarine

1 1/2 tbsp water

1/2 tsp vanilla

Line ungreased 9×9-inch pan with whole graham crackers, trimming to fit. Combine butter, sugar, milk and vanilla in large saucepan. Bring to boil and simmer for 5 minutes. Remove from heat and stir in crumbs before pouring over crackers in the pan. Cover with layer of whole crackers, trimming to fit.

While the squares are cooling, beat together ingredients for icing in a small bowl. Add more water or icing sugar until mixture is spreadable, not runny. Use to ice squares once fully cooled. Cut into 36 squares and enjoy!

B’s Tip: This recipe keeps up to one week in the fridge and tastes even better once you’ve let it sit for a couple of days.

Happy baking!

B

KBwB-Flower-50

Last year I counted down to Christmas by baking seven different types of Christmas cookies as per my favorite Swedish holiday tradition. This year I’m making it a thing, and sharing seven more delicious recipes with you. For more inspiration, you can check out more of my baking here. For even more recipe inspiration check out my Pinterest full of food eye candy that will have you licking your computer. Promise.

Baking with B: White Chocolate Fudge Bars

You guys know me and how I’m just a wee bit obsessed with brownies. My love affair started with chocolate, and continued with these butterscotch ones my mom used to make, and evolved so that I adapted the chocolate brownie recipe to suit the dietary needs of my vegan friends. Of course, this hasn’t stopped me from experimenting with even more flavor combinations (maybe I’ll share some more in an upcoming post?) but for now I couldn’t resist trying this chocolate, fudgey variety that taste just as good as they sound.

White Chocolate Fudge Bars (makes 16)

1/2 cup unsalted butter

8oz white chocolate chips (or your favorite white chocolate bar)

3/4 cups granulated sugar

2 eggs

1/2 teaspoon salt

1 teaspoon vanilla extract

1 cup all purpose flour

Preheat oven to 350F. Melt the butter with the white chocolate using a double boiler, by heating it in a glass bowl in the microwave, or by making your own makeshift double boiler.

B’s Tip: To make your own double-boiler, fill a small saucepan a third of the way full with water. Set a bowl on top (not plastic) and make sure it’s big enough to rest on the rim of the pot without fully being immersed in the water at the bottom. Place the butter and white chocolate in the bowl. Bring the saucepan to a boil on the stove. Stir gently and watch the mixture melt like magic!

Add sugar to the butter/chocolate mixture and mix well. Mix in the salt, vanilla, and eggs until incorporated. Stir in flour until well combined. Spread batter into a greased 8″ pan. Bake for 28 minutes. Let cool completely before cutting into squares.
Happy baking!

B

KBwB-BFlower-50

Baking with B appears every other Monday on the Keeping Busy with B Blog. Find out why I like baking so much here. For more of my baking, click here. And for even more recipe inspiration, check out my Pinterest full of food eye candy that will have you licking your computer. Promise.

Baking with B: Date Squares

IMG_0440

Let’s make a date, shall we, for some mid-winter treats that serve up a nice hit of sweetness without being too unhealthy. When you combine dates with oats and pecans it’s practically like granola, which means I’m totally allowed to eat these for breakfast, right? Right? I dare you not to eat them as a meal, either.

Date Squares (serves 12)

1 1/2 c. chopped, pitted dates

1/4 c. granulated sugar

1 c. orange juice

1 tsp grated orange zest

1 1/4 c. quick-cooking oats

1 c. all-purpose flour

3/4 c. packed brown sugar

1/4 c. chopped toasted pecans

1 tsp ground cinnamon

1/2 c. vegetable oil

1/4 c. water

Preheat the oven to 350F. Combine dates, sugar and orange juice in a saucepan and bring to a boil. Reduce heat to medium and let simmer for 15 minutes, or until the dates are soft and the liquid is absorbed. Mash the mixture and set aside to cool. Meanwhile, combine orange zest, oats, flour, brown sugar, pecans, cinnamon, oil and water in a bowl until combined. Pat half of the mixture onto the bottom of a greased 8″ square baking dish. Spread the cooled date mixture over top. Sprinkle the remaining oat mixture on top of the dates for the third layer. Bake in center of the oven for 25 minutes or until squares are golden. Cool before serving.

B’s Tip: Who doesn’t like pecans? Ok, maybe you’re actually one of these crazy people that doesn’t. This recipe can still be salvaged. I’d be willing to substitute for walnuts, or maybe almonds. It’s too hard to decide! Your squares, your choice, and let me know how it works for you.

Happy baking!

B

KBwB-BFlower-50Baking with B appears every other Monday on the Keeping Busy with B Blog. Find out why I like baking so much here. For more of my baking, click here. And for even more recipe inspiration, check out my Pinterest full of food eye candy that will have you licking your computer. Promise.


Baking with B: Butterscotch Brownies with the Boys

KBB_baking_butterscotch_browniesI’ll be the first to admit that I’m not really a beer person but when I invited a couple of my dude friends over for some long-awaited catching up a few months back, serving beer seemed like the natural thing to do.

Of course because I had not seen them in a long time some baked goods were requested and although I was tempted to go to my usual standby (I swear I have this recipe memorized), I decided to go with something a little more caramel in flavor and decided to serve these.

Best served when warm, these butterscotch brownies (although some people call them blondies- not sure there’s a difference?) are gooey and chewy and some of my friends and family members even prefer these to traditional chocolate brownies. Who knew?

As to whether or not they go with beer, well the verdict is out. Maybe we drank too much beer to notice. But if you’re in the mood for a gooey treat, these will win. Every time.

Butterscotch Brownies (yields 12)

1/4 c. butter or margarine

1 c. brown sugar, packed

1 egg

1/2 tsp vanilla

3/4 c. all-purpose flour

1 tsp baking powder

1/4 tsp. salt

1/2 c. chopped walnuts (optional)

Melt butter in saucepan and add it to sugar in bowl. Stir. Add egg and vanilla and stir. Measure in flour, baking powder, salt and nuts. Mix well. Spread in greased 8×8 (20 x20 cm) pan. Bake in 350F oven for 30 minutes or until sides show signs of pulling away from the pan.

Icing:

2 tbsp butter/margarine

1/4 c. brown sugar, packed

2 tbsp milk

1 c. icing sugar

Combine first 3 ingredients in saucepan. Bring to boil and simmer 2 minutes. Remove from heat. Cool. Add icing sugar and stir well. Add more icing sugar or milk as needed to make a smooth spreading icing. Frost brownies. Cut into 25 squares.

Guys, I didn’t even ice them this time. They’re that good all by themselves! Honestly, I have some friends and family members say that they prefer these over chocolate brownies. As if!
Chocolate anything is still number one in my heart, but if you’ve never tried these before you gotta make them. Maybe you’ll change your mind!

Happy baking!
B

KBwB-Flower-50

Baking with B appears every other Monday on the Keeping Busy with B Blog. Find out why I like baking so much here. For more of my baking, click here. And for even more recipe inspiration, check out my Pinterest full of food eye candy that will have you licking your computer. Promise.


Baking with B: Chocolate Brownies

Happy Valentine’s Day to all my readers!

Hey. I love you guys all so much. Thank you for supporting my blog. I’m rewarding you today because it’s a) Valentine’s Day (duh); and b) because it’s coincidentally Friday, which means that this is kind of like the solar eclipse of holidays.

Chocolate Brownies (yields 12)

1/4 c. cocoa powder

1/3 c. butter

1 c. sugar

3/4 c. flour

2 eggs

pinch of salt

In a small saucepan add together cocoa and butter. Begin to melt butter at a low temperature, stirring every so often to combine the melting butter with the cocoa powder. Meanwhile, in a mixing bowl add eggs, sugar, flour and salt. Don’t mix yet! When the butter and cocoa is melted, pour over ingredients into mixing bowl. Stir just enough to combine everything without any lumps, then pour batter into a 9×9-inch into the middle comes out clean. Let cool in pan before cutting into squares.

B’s Tip: I know it’s tempting, but wait until the brownies are completely cool before cutting them! If they’re too hot, the batter will have not set and you’ll end up with a gooey mess that will be delicious, but it won’t be a brownie.

This brownie has a cake-like texture and a chocolatey flavour that isn’t too overhwelming, so it’s perfect for add-ins. You may want to try adding some nuts to the batter, or just smearing with your favourite frosting. Delicious!

Happy baking!

B

KBwB-Flower-50

Baking with B appears every other Monday on the Keeping Busy with B Blog. Find out why I like baking so much here. For more of my baking, click here. And for even more recipe inspiration, check out my Pinterest full of food eye candy that will have you licking your computer. Promise.

Chocolate not your thing? No worries. I’ve got a butterscotch version here. Follow a vegan diet? I’ve got you covered too.