7 Days of Christmas: Cranberry, Pistachio and Almond Cookies

Psst- this post is in a series where I share my family’s tradition of baking seven different cookies every Christmastime. To save time and money, each cookie in this series is based on this basic vanilla cookie dough recipe.

There was a patient at the office who used to bring batches of these cookies around Christmastime. They became famous in our office because we couldn’t believe that such a frail, elderly lady had the stamina to stand in front of the oven for days on end as she must have done, baking all of these cookies for her family and friends. She was so slouch either- each one was perfectly shaped, sliced and baked to perfection. This version pales in comparison to hers but it was the closest I could come. Try them for yourself and see why these cookies became such an obsession!

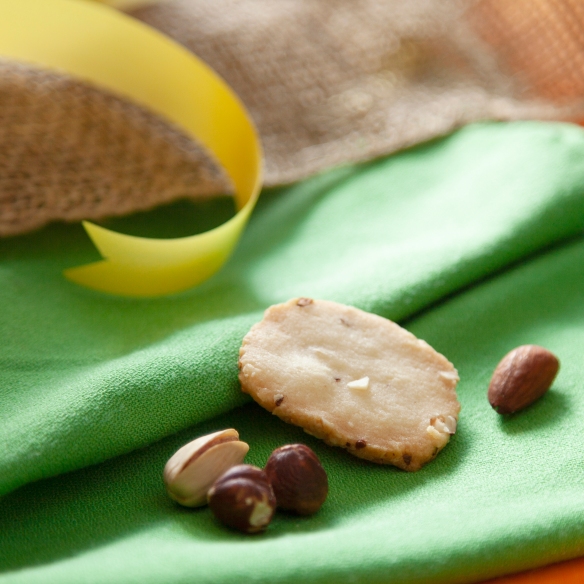
Cranberry, Pistachio and Almond Cookies (yields 10 dozen)

1/3 c. finely crushed pistachios

1/3 c. finely crushed almonds

1/3 c. finely chopped dried cranberries

one batch of this vanilla cookie dough (include the baking powder this time!)

Prepare the vanilla cookie dough by following the instructions here. In a separate bowl, mix together nuts and cranberries. Incorporate with the cookie dough. Once they’ve been mixed in, divide dough in two pieces. Shape each into a log approximately 10 inches long. Wrap each log in plastic wrap and refrigerate on a flat surface (like a cookie sheet) until very firm, approximately two hours.

Once dough is set, remove from fridge and unwrap plastic wrap. (Reshape the log if it’s looking a little sad.) Using a clean, sharp knife, slice your log into diagonal pieces, approximately 1/8-inch thick. Place on a cookie sheet approximately 1/2-inch apart. Bake in an oven preheated to 350F on a parchment-lined cookie sheet until firm, approximately 12-14 minutes.

I’m counting down Christmas by sharing some of my favourite holiday cookie recipes with you! I’ll be posting a different Christmas cookie recipe every day for the next seven days so you can follow along in my family’s baking tradition, and have more cookies to add to your Christmas baking arsenal! For more inspiration, you can check out more of my baking here. For even more recipe inspiration check out my Pinterest full of food eye candy that will have you licking your computer. Promise.

7 Days of Christmas Cookies: Yule Nut Log

Psst- this post is in a series where I share my family’s tradition of baking seven different cookies every Christmastime. To save time and money, each cookie in this series is based on this basic vanilla cookie dough recipe.

Let’s face it: Christmas is overloaded with sweet stuff. Between holiday parties and gifts and caroling with hot cocoa, we’ll probably consume enough sugar to last us for the whole year. (Or at least for a couple of weeks.)

That’s why I always think it’s nice to include a not-so-sweet cookie with a subtle flavor. Buttery vanilla pairs beautifully with any kind of salty, nutty flavor and it’s perfect with the hot drink of your choice.

Yule Nut Log (yields 10 dozen)

1/3 c. finely crushed peanuts

1/3 c. finely crushed pistachios

1/3 c. finely crushed hazelnuts

1/3 c. finely crushed almonds

one batch of this vanilla cookie dough (include the baking powder this time!)

Prepare the vanilla cookie dough by following the instructions here. In a separate bowl, mix together nuts. Pour in 1/3 of the bowl and incorporate with the cookie dough. (I wanted my cookies to have a really nutty flavor, but if you’re not into it then just keep all the nuts for the next part). Once incorporated, divide the dough in two pieces. Shape each into a log approximately 10 inches long. Spread out the rest of the nut mixture onto a flat surface and roll each log in it until fully coated, patting down as you go along to prevent too many crumbly bits falling off. Wrap each log in plastic wrap and refrigerate on a flat surface (like a cookie sheet) until very firm, approximately two hours.

Once dough is set, remove from fridge and unwrap plastic wrap. (Reshape the log if it’s looking a little sad.) Using a clean, sharp knife, slice your log into diagonal pieces, approximately 1/8-inch thick. Place on a cookie sheet approximately 1/2-inch apart. Bake in an oven preheated to 350F on a parchment-lined cookie sheet until firm, approximately 12-14 minutes.

I’m counting down Christmas by sharing some of my favourite holiday cookie recipes with you! I’ll be posting a different Christmas cookie recipe every day for the next seven days so you can follow along in my family’s baking tradition, and have more cookies to add to your Christmas baking arsenal! For more inspiration, you can check out more of my baking here. For even more recipe inspiration check out my Pinterest full of food eye candy that will have you licking your computer. Promise.

7 Days of Christmas Cookies: One-Dough Wonders

A few years back I started sharing my family’s Swedish tradition of making seven different types of cookies at Christmastime and since then it’s kind of taken off- in my personal life, at least. I guess there were a lot of people IRL that didn’t realize that I baked, or that I baked that much around this time of year.

I started off by sharing some traditional Swedish favourites (with a few thrown in for variety). They were: traditional Swedish gingersnaps, maple butter cookies, jam slices, rugulahs, orange crunch cookies, vanilla horns and chocolate crinkle cookies.

The next year I found myself strapped for baking time and decided to do a “no-baking” theme for my cookie selection. (Okay, so maybe one of them you had to bake in the oven- but it still cuts down on the work!) Those recipes included Butterscotch Bars, Midnight Mints, Chocolate Roll, Date Pecan Bars, Marshmallow Roll, Pineapple Log, and Butterscotch Confetti.

So you’re probably wondering what on earth it is I’m going to do with all this:

Well, I’ll tell you what I’m going to do: this year I’m using the same vanilla dough base (with a couple of add-ins) and all of the ingredients you see above to make seven unique kinds of cookies that you can serve at any time of year, really. Once you got the dough down pat (recipe to follow), you can build yourself a collection of cookies that are surprisingly diverse in flavor (considering they’re all made from the same dough!).

One-Dough Wonder Vanilla Cookie Dough

(yields 5-10 dozen cookies depending on recipe)

3 c. all-purpose flour

3/4 tsp. baking powder (omit if making thumbprint cookies)

1/2 tsp. salt

1 c. unsalted butter

1 c. sugar

1 large egg

2 tsp. vanilla extract

Whisk together flour, baking powder and salt in a large bowl. Beat butter and granulated sugar until pale and fluffy. Beat in egg and vanilla. Add flour mixture and beat until combined. Dough can be covered in plastic wrap and chilled up to 2 days.

I can’t wait to show you some of the tasty treats I’ve come up with just by using this simple cookie dough. Stay tuned!

Happy baking!

B

I’m counting down Christmas by sharing some of my favourite holiday cookie recipes with you! I’ll be posting a different Christmas cookie recipe every day for the next seven days so you can follow along in my family’s baking tradition, and have more cookies to add to your Christmas baking arsenal! For more inspiration, you can check out more of my baking here. For even more recipe inspiration check out my Pinterest full of food eye candy that will have you licking your computer. Promise.

Baking with B: Rocky Road Sour Cream Brownies

_mg_0826

I confess I used to be one of those people that scoffed at the idea Valentine’s Day. Like those other haters, I believed it was too commercialized, and I resented feeling excluded all of those years I was single on February 14.

As I’ve gotten older and found it more difficult to keep up with all of my personal relationships, I’m starting to realize those greeting card companies might be onto something. There just aren’t a lot of opportunities for romance amidst today’s hustle and bustle unless you make the time for it. Sure, ideally you’d like to show your partner your appreciation every day, but now I think there’s something to be said for putting aside a day once a year for doing something special.

That’s why I’m starting to think Valentine’s Day is really for those in long-term relationships- those relationships that are filled with chores and kids and bills and all those other wonderful things life throws your way as an adult. Those couples need a day like this. They need a way to make things extra-special.

Kind of like these brownies. My chocolate brownies are kind of a staple in my household, and yet when do I ever get the opportunity to jazz them up a little? Valentine’s Day seemed like the perfect excuse to bake this ooey-gooey, junked-up version. The result? A brownie that’s perfect for your favorite chocoholic, or for anyone that you want to feel special.

Rocky Road Sour Cream Brownies (makes 25)

Brownie Base:

1/2 c. butter, melted

1 c. sugar

1/2 c. flour

1/3 c. cocoa

1/4 tsp baking powder

1/4 tsp salt

1/2 c. sour cream

Rocky Road Topping:

1/2 c. milk or semi-sweet chocolate chips

1/2 c. mini marshmallows

1/2 c. slivered almonds

Preheat oven to 350F. In a medium-sized bowl, cream together butter, sugar and vanilla. Beat in eggs one at a time until frothy, then use a spoon to add sour cream and mix well. In a separate bowl, combine flour, cocoa, baking powder and salt. Stir dry ingredients into wet ingredients until fully combined. Bake in a greased 8-inch pan for approximately 35 minutes.

Remove brownies from oven and sprinkle chocolate chips, marshmallows and almonds (in that order) over top, taking care to distribute evenly. Return to the oven and bake for 5-10 minutes more, or until marshmallows get puffy and golden. Let the brownies cool at least 10-15 minutes before cutting.

B’s Tip: The sour cream brownie base makes these treats really soft at first, so it’s based to wait until brownies are just about cool for the cleanest, neatest cuts. But who am I kidding? Chocolate is chocolate, and these taste good pretty much any which way.

Happy baking!

B

KBwB-Flower-50Baking with B appears every other Monday on the Keeping Busy with B Blog. Find out why I like baking so much here. For more of my baking, click here. And for even more recipe inspiration, check out my Pinterest full of food eye candy that will have you licking your computer. Promise.

Baking with B: Andi’s Gluten-Free Cranberry Almond Biscotti

19cranorangebisc-final

Andi is a neighbor of mine and one of the people that I admire most in this world: she carries herself with such poise and grace that it almost makes me envy her; and you’d hate her for how smart, beautiful and accomplished she is except that she’s so kind-hearted you kind of have to love her anyways.

So when I was making my neighbors some goody bags for Christmas, I felt badly for excluding Andi because of her gluten-free diet. She’s always lamenting that she never gets to try any of the things that I make, so I decided it was time to make her something of her own.

Having not ever made biscotti before-combined with being unfamiliar with many of the GF flours out there- made me a little bit nervous. The results were golden and a little bit spicy, but for some reason retained a slightly chewy texture in the middle that was decidedly delicious, but decidedly un-biscotti like. (Psst. Here’s the part where you email me with your gluten-free, biscotti-making advice.)

Still, I liked them enough to try them again and include them in my baking repertoire. The almond flour gives it an even nuttier flavor that’s not too sweet, and it goes perfectly with a strong Italian espresso.

Andi’s Gluten-Free Cranberry Almond Biscotti (makes 12)

(based on a recipe I originally found here)

2 large eggs

1/3 c. honey

zest from one orange

1 1/2 c. almond flour

2 tbsp arrowroot flour

1/2 tsp baking soda

1/4 tsp sea salt

1/2 c. dried cranberries

1/2 almonds, sliced

In a medium bowl, combine eggs, honey and orange zest and beat until frothy. Add flours, baking soda and sea salt to the bowl and mix until a dough forms. Add cranberries and almonds and stir to combine.

Spoon out dough onto a parchment-lined cookie sheet and use fingers to shape it into a long rectangle, approximately 4×12 inches. (B’s Tip: The dough will be sticky, gooey and hard to manipulate so you can always use the back of a spoon that’s been dipped in cold water to help shape your rectangle.) Make sure to leave room on all sides as the dough will spread as it cooks.

Bake dough in oven that’s been preheated to 350F for approximately 20 minutes or until golden. Remove from the oven and let cool for 1 hour. Once cooled, slice your log on a diagonal to get those long, angular biscotti shapes (about 1″ thick). Lay biscotti on their sides and return to oven for an additional 15-20 minutes until crunchy.

B’s Tip: Believe me, it’s hard to wait for the biscotti to cool before slicing them but trust me- they’re much easier to slice if you do and they need that drying-out time to get that crunchy consistency. Make the process go faster by placing your cookie tray on a raised cooling rack to get the air flowing underneath it, and keep them far away from your warm oven!

Happy baking!

B

KBwB-Flower-50Baking with B appears every other Monday on the Keeping Busy with B Blog. Find out why I like baking so much here. For more of my baking, click here. And for even more recipe inspiration, check out my Pinterest full of food eye candy that will have you licking your computer. Promise.

Baking with B: Homemade Granola Bars

Granola, granola, granola. In all the forms, with all the flavours: nuts, fruit, chocolate. You name it, I’m addicted. I’ve never really met a granola that I didn’t like and I’m a firm believer that it tastes best with a healthy heap of thick yogurt, some fresh fruit, and a drizzle of honey.

But sometimes…I get lazy. And I get busy. And in the summertime there are some days that are just so beautiful that I feel like I’ll explode if I don’t get outside right this minute and enjoy the fresh air. Who has time for things like cleaning and showering and eating when there’s sunshine and a warm breeze waiting? (I’m joking; of course I shower.)

Mornings like these my dog, Gemma, is raring to go too, so I’ve taken to making a big batch of these whenever I can force myself to stay indoors to bake for an hour or two. Then it’s grab one of these and seeing where the morning takes us- to the park, along the boardwalk- the possibilities seem endless. Better take two along, just in case.

Homemade Granola Bars (makes 12-16)

2 c. old-fashioned oatmeal

1 c. sliced almonds

1 c. shredded coconut, loosely packed

½ c. toasted wheat germ

3 tbsp unsalted butter

2/3 c. honey

¼ c. light brown sugar, lightly packed

1 ½ tsp. pure vanilla extract

¼ tsp. kosher salt

½ c. chopped pitted dates

½ c. chopped dried apricots

½ c. dried cranberries

Preheat the oven to 350F. Butter an 8×12” baking dish and line it with parchment paper. Toss the oatmeal, almonds, and coconut together on a sheet pan and bake for 10-12 minutes, stirring occasionally, until lightly browned. Transfer the mixture to a large mixing bowl and stir in the wheat germ. Reduce the oven temperature to 300F. Place the butter, honey, brown sugar, vanilla, and salt in a small saucepan and bring to a boil over medium heat. Cook and stir for a minute, then pour over the toasted oatmeal mixture. Add the dates, apricots, and cranberries and stir well. Pour the mixture into the prepared pan. Wet your fingers and lightly press the mixture evenly into the pan. Bake for 25-30 minutes, until light golden brown. Cool for at least 2-3 hours before cutting into squares.

Happy baking!

B

KBwB-Flower-50

Baking with B appears every other Monday on the Keeping Busy with B Blog. Find out why I like baking so much here. For more of my baking, click here. And for even more recipe inspiration, check out my Pinterest full of food eye candy that will have you licking your computer. Promise.