The Great Cookie Exchange

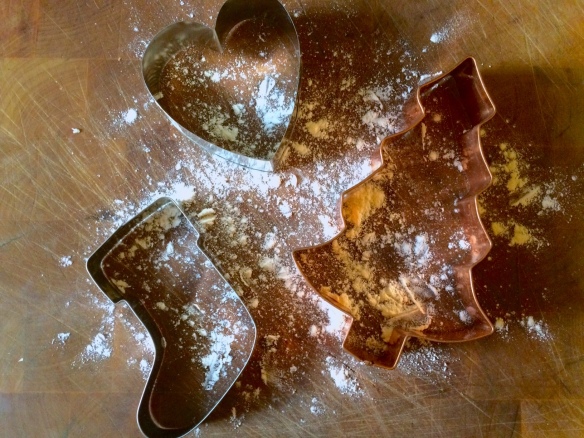
Who doesn’t like Christmas cookies? (If you don’t, then you’re definitely not going to like this post.) One of my favourite things to do around this time of year is to give out baked goodies to everyone I know. Years and years ago I even used to do annual cookie exchanges with my friends.

You’ve done one of those before, right? Each party guest is assigned the task of bringing enough cookies for each party guest to take home (half to one dozen is a good amount) so everyone ends up with a variety of treats to serve at Christmas time. (That is, if they can last until then.)

Here’s some of what I learned from my past experiences:

  • Do try and circulate a list to get a sense of what everyone is bringing so you don’t get any repeats.
  • Don’t micromanage what every single person is going to make. The fun of it is having something unique from everyone, based on their background, their family traditions and their own personal preferences.
  • Do make sure you double-check for any dietary restrictions or allergies.
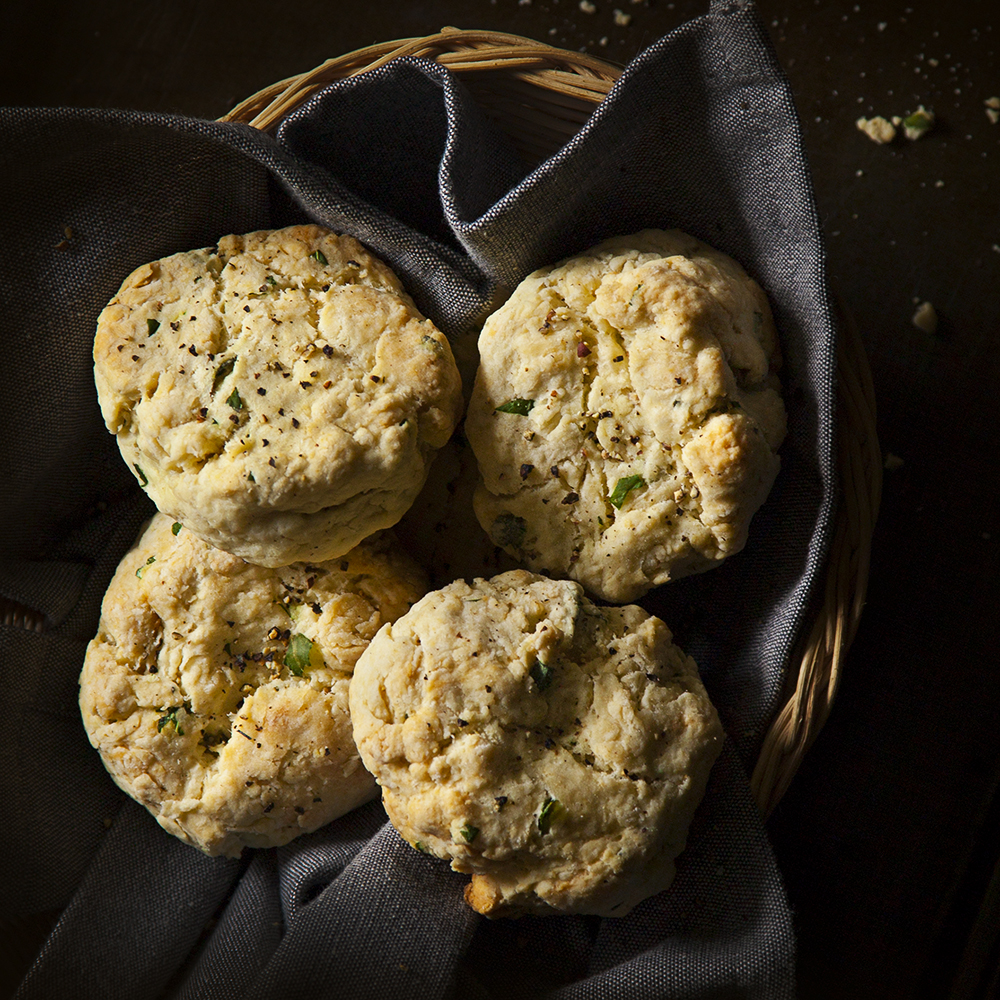
  • But if you do end up making a recipe someone can’t eat, don’t forget to bring them an alternative instead. (Like the gluten-free biscotti I made for my friend Andi here.)
  • Do pre-package your cookies for each guest to make life easier for you, your guests, and to protect against any contamination.
  • Don’t overdo it. No one likes a show-off at a cookie exchange (unless you’re showing off how many cookies you can eat).
  • Do make sure to bring along a copy of the recipe just in case any one wants to try it out for themselves. (The only exception is if it’s a super-top secret family recipe.)
  • Don’t take it personally if someone declines your cookies! It’s probably got more to do with their personal tastes than it does your baking.

As for baking inspiration? Well around this blog, we’ve got plenty. In my last post I talked about all the Christmas cookies that I usually make every year, but the recipes found here and here are also great to make as take-alongs. I even participated in an online cookie exchange once. I’ve also been amassing a list of recipes that I’d like to try here on Pinterest.

What are you making for Christmas this year? Are you and your friends holding a cookie exchange? Let us know all the details by commenting below or emailing me at keepingbusyb@gmail.com

And hey, I realize I am not the only baking blogger on the blog. If you’ve got some great recipes you’re sharing on your blog for Christmas (or any other holiday) leave a comment below with the name of your blog and the link to your favourite recipe.

Can’t wait to see what you guys have been baking!

Holiday celebrations can be fun, but only if you can ensure that things go smoothly. While there are never any guarantees when it comes to social gatherings, there are still plenty of ways to get your holiday game on. Click here to read more of them, or click here or here to read about some of the other best practices I’ve been trying to put into my place in my life.

Do you have any tips on how to survive the holidays? Save us by commenting below or email your suggestions to keepingbusyb@gmail.com

Ready, Set, Celebrate!

Now that Halloween has passed we’ve all inevitably started talking about the holiday season. (Here in Canada we celebrate Thanksgiving a little earlier, so there’s really nothing else to look forward to during the month of November.)

This is the time of year when everyone’s schedules start filling up with celebrations and social events. Unfortunately, each of those events come with its own set of tasks that make people start feeling frantic instead of festive. There’s just so much to do. A friend of mine put it very eloquently: “I love Christmas, but there’s just so much s@&! to do!”

Planning is kind of my thing, so I often share how I organize my holidays on the blog: here’s how I get a head start on Christmas cards, how I plan my gift shopping and my Boxing Day strategy. If you really have the drive to plan far ahead, you may find this post on cleaning up after the holidays useful.

For the past couple of years I’ve carried out the Swedish tradition of baking seven different cookies at Christmas time. Here’s what’s been in my arsenal so far: Traditional Swedish Gingersnaps, Maple Butter Cookies, Jam Slices, Vanilla Horns, Rugulahs, Orange Crunch Cookies, Chocolate Crinkle Cookies, Midnight Mints, Butterscotch Confetti, Date Pecan Bars, Chocolate Roll, Pineapple Log, Marshmallow Roll, Butterscotch Bars etc. (Stay tuned- in the month of December I’ve got seven brand new cookie recipes for you I think you’re going to love.)

I love writing about the holidays and all the kindness it brings out in people, but I realize for some there can be a dark side of the season. A couple of years back I had a very difficult Christmas so I channeled that energy into writing a blog post about being alone during the holidays– and how you’re really not alone if you feel that way. (You may also want to check out this post if you’re feeling down.)

And if that isn’t enough holiday goodies for y’all then you’re in for a treat- for the next six weeks or so I’ll be sharing more of my favourite holiday recipes, some fantastic Christmas gift ideas and some of my secrets for staying sane during this busy time of year.

Don’t worry if even reading this post is giving you the shakes; this holiday season, we’re all in this together!

Holiday celebrations can be fun, but only if you can ensure that things go smoothly. While there are never any guarantees when it comes to social gatherings, there are still plenty of ways to get your holiday game on. Click here to read more of them, or click here or here to read about some of the other best practices I’ve been trying to put into my place in my life.

Do you have any tips on how to survive the holidays? Save us by commenting below or email your suggestions to keepingbusyb@gmail.com

Baking with B: Classic Rice Pudding with Fresh Raspberries

If any of you follow me and the saga of my porch garden on Instagram you’ll know that I have a couple of raspberry plants that over the summer have produced the occasional fruit. (To be honest, I didn’t have high expectations to begin with so I was happy I got any berries at all.)

Well, wouldn’t you know, mere days before October arrives, these little plants decide to wake up and grow raspberries like there’s no tomorrow. They’re pretty teensy and tart, but there’s a fresh crop coming out each day. However, I still didn’t have quite enough to bake with so I had to rack my brain to figure out what I could do with them.

Enter rice pudding: one of the greatest desserts to make when you have practically nothing in your pantry and you’re craving something sweet. It’s creamy with a hint of vanilla and it’s the perfect delivery method for sweet-tart raspberries (although really, I think any fruit will do).

Oh, and did I mention it’s actually pretty easy to make? See what I mean for yourself…

Classic Rice Pudding with Fresh Raspberries (makes approx. 4 servings)

(loosely based on the recipe found here)

3/4 c. uncooked white rice (short or medium grain is best)

2 c. milk

2 tbsp vanilla custard powder

1/3 c. white sugar

1/4 tsp salt

1 egg, beaten

1 tbsp butter

raspberries, to taste (or fruit of your choice)

Note: I used vanilla custard powder in this recipe because it gave me such a rich, creamy vanilla flavor. The original recipe suggests adding 1/2 tsp vanilla extract at the very end, which is perhaps a little more traditional than my method.

In a medium saucepan, bring 1 1/2 c. of water to boil. Add rice and let simmer on low, covered for approximately 20 minutes.

Whisk custard powder in with milk until dissolved. In a separate saucepan, bring 1 1/2 c. of milk to a slow boil, stirring occasionally to prevent scalding. Add in cooked rice and sugar, stirring to combine. Let simmer on low for 15-20 minutes until texture becomes quite thick.

B’s Tip: I suggest adding the sugar last to your mixture because I added it first while the milk is still heating up. That’s ok, too, but if you’re not watching it (and I wasn’t) the sugar will end up caramelizing and burning at the bottom of your pan, making it hotter than you really want it to be. On the bright side, I ended up with all these really delicious flakes of burnt sugar scattered throughout my pudding. It was a lemons-into-lemonade kind of situation.

Stir in remaining 1/2 c. milk (you may want to give it a slight whisk beforehand) and beaten egg. Stir to combine and let cook for two minutes more. Remove from heat and stir in butter. Let pudding sit for 10 minutes before serving. Scatter with raspberries (or fruit of your choice.

Rice pudding can be served hot or cold, but I prefer it slightly warm because that’s when the texture feels just right. (So creamy! So vanilla-y!) If you’re not a fan of rice pudding because all you’ve had is the gelatinous, cold stuff from the grocery store, I ask you to try this recipe and reconsider. It may have a reputation as a dessert for the elderly, but I think you’ll find it’s actually delicious for all ages.

Happy baking!

B

Baking with B appears (usually) every other Monday on the Keeping Busy with B Blog. Find out why I like baking so much here. For more of my baking, click here. And for even more recipe inspiration, check out my Pinterest full of food eye candy that will have you licking your computer. Promise.

Baking with B: Chocolate Beet Cake

Aarrggh! I gave the secret ingredient away in the title already. You may wish to be less forthcoming than I have been- beets have a bad rap for being so red, so earthy-flavored, so…beet-ish. However, when they’re mixed with chocolate for some reason it just works. (I’d like to know more about the person who came up with that idea.)

I don’t often foray into baking with vegetables (except this time) that but that lonely can of beets in my cupboard (plus my friends’ insistence that it could not be done) inspired me to make a Chocolate Beet Cake and honestly? It’s kind of marvelous. Don’t trust me? Try it yourself! It’s been loosely adapted on this recipe I found here.

Chocolate Beet Cake (makes 2 9-inch round cakes)

3/4 c. butter

2 c. white sugar

3 eggs

2 1/2 c. all-purpose flour

1/2 c. cocoa powder

1 1/2 tsp baking soda

1/2 tsp salt

1 c. milk

1 14-oz. can of beets, drained and rinsed, with 1/2 c. of beet juice for reserve

1/2 c. reserved beet juice

First, you gotta puree those beets. Use your blender, slap-chop, whatever- just get ‘er done. Me, I went the old-fashioned way, simmering the beets in a saucepan on the stove until super moist before going at them with my hand-blender. Set aside beets aside.

Preheat the oven to 350F. In a medium bowl, combine flour, cocoa, baking soda and salt. In a separate bowl, cream together butter and sugar before adding eggs. Beat until thick and frothy. Slowly start adding the dry ingredients to the wet ingredients a bit at a time, alternating with the milk until fully combined.

Remember those beets? Stir them in last, then the beet juice you’ve saved from the can. Grease and flour two 9-inch round or square baking pans and pour batter into pans. Cook for about 25 minutes, or until a toothpick or a knife comes out clean when inserted.

B’s Tip: You know what they say about buying good-quality cocoa powder? Yeah, I laughed too, but I wasn’t laughing after a friend gave me some of hers to use in this cake. It honestly makes a world of difference so if you can afford it (or if it’s a special occasion) I highly recommend using the best you can find for this recipe.

Happy baking!

B

Baking with B appears (usually) every other Monday on the Keeping Busy with B Blog. Find out why I like baking so much here. For more of my baking, click here. And for even more recipe inspiration, check out my Pinterest full of food eye candy that will have you licking your computer. Promise.

Baking with B: Garden Herb Scones

Guys, I know you think I’m all fancy-like but when I say these scones do not take up a lot of time it is the absolute truth. You’d think a treat associated with something as fussy as a tea service would be complicated but they are not. The hardest thing about baking these is going to be deciding what you’re going to put in them. I used fresh herbs from my garden (because they’re running amok, please, someone come help me) but you could put in grated cheese, raisins, nuts, dried fruits, fresh fruits…see? I told you it was going to be hard.

Garden Herb Scones (makes approx. 12)

4 tbsp butter, softened

1 egg, beaten

1/4 tsp salt

2 c. flour

1 tbsp. baking powder

5 tbsp. milk

fresh herbs, finely chopped (to taste)

Preheat the oven to 400F. Beat butter and eggs together until creamy; set aside. In another bowl, sift together flour, salt and baking powder. Add dry ingredients to the butter mixture a little bit at a time, alternating with the milk. Mix in your herbs (in this case, I used rosemary, basil and sage). Using your hands, form a ball shape then place on a baking sheet lined with parchment paper. Use your fist to flatten the tops gently, but not enough to take away that nice rounded edge. Bake in oven for about 20 minutes or until golden brown. Serve as soon as they’re cool enough to eat!

B’s Tip: Nobody’s perfect, and sometimes your measurements may be a little bit off. Adding the milk a little bit at a time allows the batter to form without getting too slimy or wet. If you find you’ve reached the perfect consistency before you’ve added all the milk, you can stop right there. Mixture still feeling a little dry? Go ahead and put it all in!

Happy baking!

B

Baking with B appears (usually) every other Monday on the Keeping Busy with B Blog. Find out why I like baking so much here. For more of my baking, click here. And for even more recipe inspiration, check out my Pinterest full of food eye candy that will have you licking your computer. Promise.

Baking with B: Cherry Vanilla Cake

It’s been quite some time since I’ve written a post about something I’ve made- and the truth is, I haven’t really been baking as much as I used to. Seeing all the fresh fruit around at this time of year, however, sparked my interest again. That, and having a friend who has a cherry pitter gave me a great deal of encouragement. (Don’t have one? I suggest you befriend someone who does, immediately.)

Cherry Vanilla Cake (serves 8-12)

2/3 c. butter, softened

4 eggs

1 1/2 c. sugar

2 tsp vanilla extract

2 1/2 c. all-purpose flour

4 tsp baking powder

1 c. milk

2 c. fresh cherries, pitted and chopped

Vanilla Buttercream Frosting

1 1/2 c. butter, softened

2 c. icing sugar, sifted

1/2 tsp vanilla extract


Preheat the oven to 350F. Melt butter, set aside. In a bowl, beat eggs and sugar until light yellow and very thick (use a mixer if you’re not brave enough to do it by hand). Stir in the vanilla. In a separate bowl, combine flour and baking powder. Add dry ingredients to the egg mixture a little bit at a time, alternating with the butter and milk. Stir until thoroughly combined. Gently stir in 1 1/2 cups of the cherries, reserving the remainder. Grease and flour two round (6-cup) cake pan. Pour batter into prepared pans and bake on low oven rack for 40-50 minutes. Let cakes rest in pan 10-15 minutes before turning them out on racks to cool.

Next, place the remaining cherries in a small saucepan and cook on low heat, 15-20 minutes, stirring occasionally until mixture resembles thick liquid (you may have to add a pinch of water or two to get the consistency needed). Remove from heat and cool.

To make buttercream frosting, beat butter until creamy and add sugar 1/2 c. at a time, until well combined. Add vanilla extract and beat until smooth.

Slice the top off of your first cake. Spread with buttercream frosting, and spoon over half of the cherry mixture. Place second cake on top and layer with the remaining frosting and cherries. Top with additional fresh cherries, if desired.

I love the combination of vanilla and cherry flavors, and using fresh cherries gives it a sweet-tart flavor instead of using something from a can. There’s so many fresh, local fruits in season though that you could swap the cherries out with virtually anything your little heart desires- this cake recipe is simple enough to support a dazzling array of flavors. This cake would be awesome served warm and as-is, but sometimes it’s nice to go the extra step.

Man, that felt good to share another baking post again. Hopefully I won’t be as long in sharing the next one!

Happy baking!

B

Baking with B appears  (usually) every other Monday on the Keeping Busy with B Blog. Find out why I like baking so much here. For more of my baking, click here. And for even more recipe inspiration, check out my Pinterest full of food eye candy that will have you licking your computer. Promise.

Baking with B: Chocolate Spice Cookies

Do you ever get tired of making the same thing, over and over again? (I used to feel that way about birthday cakes.) I was searching for something to serve during a recent family visit and none of my old standards were really grabbing me. Trying something new didn’t really appeal to me either- I didn’t have the time or energy for experimenting.

I was beginning to feel discouraged until I thought- hey, why reinvent the wheel? You know a lot of great classic recipes, B. Why not spice one up so you can have the best of both worlds?

I took my own advice. Literally. I whipped together the ingredients for my favorite butter cookie recipe (also featured here) and turned things up a notch. I’m pretty pleased with the results, too- these Chocolate Spice Cookies melt in your mouth just like a butter cookie, but taste like a gingersnap, with an extra splash of chocolate to keep things sweet.

Chocolate Spice Cookies (makes 28)

3/4 c. butter, softened

1/2 c. sugar

1 1/2 c. all-purpose flour

2 tsp. cinnamon

2 tsp. nutmeg

1 1/2 c. chocolate chips, melted

Cream together butter and sugar until well blended. In a separate bowl, sift together spices and flour and mix with wet ingredients, adding one spoonful at a time until ingredients are fully combined. Divide the dough and shape into two flat discs. Cover with plastic wrap and refrigerate for 30 minutes.

Preheat oven to 350F. Remove dough from refrigerator and unwrap. Use your hands to shape dough into desired shape, before placing on a parchment-lined cookie sheet approximately one inch apart. Press down each cookie with a fork before baking 10 minutes. Remove from oven and place on cookie rack until fully cooled.

Melt chocolate in a double-broiler or microwave until smooth. Dip each cookie halfway into the chocolate before placing on waxed paper. Refrigerate until chocolate is set.

B’s Tip: Just because I used chocolate chips doesn’t mean you can’t use your favorite baking chocolate or chocolate bar to make the melted chocolate! You may want to drizzle the chocolate over the cookies instead, or skip that step altogether and throw your chocolate chips into the dough before baking.

The best thing about making over a classic recipe like this is that the variations don’t have to stop there- you can change up the chocolate, switch out the spices, or add nuts or your favorite dried fruit for even more flavor. Your cookies don’t even have to be the same shape- I tried molding mine into logs before squashing with a giant serving fork, instead of the usual circular cookies I make. See? Spicing up your old routine can be addictive. I highly suggest you try it too. You never know what you might come up with!

Happy baking!

B

Baking with B appears every other Monday on the Keeping Busy with B Blog. Find out why I like baking so much here. For more of my baking, click here. And for even more recipe inspiration, check out my Pinterest full of food eye candy that will have you licking your computer. Promise.

Baking with B: Chocolate Pudding Brownies

Isn’t it awesome when you can take something from your cupboard normally used for one thing and then make something completely different using that same thing?

If you don’t follow, then you obviously haven’t made these Chocolate Pudding Brownies where the secret ingredient is (not surprisingly) chocolate pudding. They’re super-soft and moist and honestly do kind of taste like chocolate pudding- if you bake them right, they have that soft, smooth pudding texture that gives the recipe its name. Apologies to brownie purists everywhere-my favorite brownie recipe is still this one-but for people that are short on time and looking for simple baking solutions, this is definitely one you should add to your roster.

Chocolate Pudding Brownies (makes 25 squares)

6 tbsp butter, softened

2/3 c. sugar

2 eggs

1 tsp. vanilla extract

1/2 c. all-purpose flour

1 box instant chocolate pudding powder (4-serving size)

Preheat oven to 350F. In a medium bowl, cream butter and sugar until smooth before beating in eggs, one at a time. Add vanilla. In a separate bowl, sift together flour and chocolate pudding powder. Combine with wet ingredients just until moistened. Spread evenly in a greased 8×8-inch pan and bake for 30 minutes until pick inserted in center comes out moist, not wet, with batter.

B’s Tip: Depending on how hot or cold your oven runs, you may want to check up on these babies frequently to make sure you don’t over-bake them. They’re still pretty tasty if you do, but the texture comes out kind of gummy and spongy instead of cake-y and moist.

These brownies are so ooey, gooey good that you should wait until they cool before cutting and serving, but if you just can’t wait why not pair one with your favorite ice cream or frozen yogurt for a brownie-licious sundae? Just add whipped cream and chocolate sauce and you’re good to go! Brownie points if you top it with a maraschino cherry. (See what I did there?!)

Happy baking!

B

Baking with B appears every other Monday on the Keeping Busy with B Blog. Find out why I like baking so much here. For more of my baking, click here. And for even more recipe inspiration, check out my Pinterest full of food eye candy that will have you licking your computer. Promise.

That’s the Way the Cookie Crumbles

kbb_splat

I’ve been helping my mother in the kitchen ever since I can remember; I made my first recipe with her when I was seven, and most of my baking skills come from experience rather than instruction.

I think I got a reputation as a good baker mostly because I’m a prolific one, and I’m not afraid to try a new recipe or develop one myself. Just because I enjoy a baking challenge doesn’t mean that I haven’t had my baking ups-and-downs.

I’ve committed the usual rookie mistakes such as over-mixing, or not bringing my eggs to room temperature ahead of time. But to be honest, the majority of my mistakes have usually been oven-related. Cooking times in any recipe can always vary depending on the oven. Investing in an oven thermometer was a revelation. (Thanks, Anna Olsen!)

I’m also kind of a klutz so I’ve been known to spill all manner of ingredients, bend spoons, stain clothes, and yes- drop an entire carton of eggs on the floor.

People who know me personally will remember why I’m wary of microwaves because they’ve heard the story of how I lit a stick of butter on fire because I stuck it in the microwave to melt without removing the foil first. (Please remove the foil.)

My favorite baking mishap, though, happened during university when I served on the editorial board of an arts magazine. We were trying to organize a bake sale to raise more funds to make our publication super pretty. No problem for an experienced baker like me, right? I even went so far as to commandeer a friend’s kitchen for the day and organized a baking assembly line to get things done faster.

What I didn’t bargain for, though, was the fact that we were using cake mixes from a box.

Now I’m not above using cake mixes (see here or here for some ideas on how to fancy them up) but at the time I was a D.I.Y. kind of gal that had been taught by a pretty traditional baker. I had honestly never baked anything from a box before. But again, no problem! Right?

Well.

I don’t know if I messed up the ingredients, or something went wrong with the mixing, or if I had merely been distracted and done a bad job of supervising. What I do know was that my team was in charge of muffins and what came out of the oven did not resemble muffins at all. Well, they were shaped like muffins- kind of- except much, much smaller.

One of the girls turned to me, “I thought you said you knew how to bake?”

“I do! I swear!” I cried. “These are just…pocket muffins.”

“What?”

“Pocket muffins. You know, muffins that you can just grab, stuff in your pocket and go. Perfect for a small snack.” (See? I was into marketing even then.)

She frowned. “I thought we were making the regular size?”

I need to cover. Fast. “Yeah but think of how many more of these we can sell because they’re smaller! They’ll make us more money!”

They did not. The “pocket muffins” sat on the table a day later at the bake sale, untouched, surrounded by more human-sized baked goods. It dawned on us that maybe we should have tried one of them.

We shouldn’t have. They were hard, and kind of chewy like a granola bar, and the dehydrated blueberries included in the mix had somehow liquefied and hardened again into these nasty little lumps.

The squirrels in the quad, on the other hand, loved them.

It wasn’t one of the highlights of my baking career, that’s for sure, and I’m sorry to say that I didn’t glean much baking knowledge from the experience. I did learn, however, that there is room for error in any baking endeavor, no matter how much experience or training you have. The most important thing is having the ability to roll with the punches and have a good sense of humor.

But I am happy to report that I’ve never been able to duplicate that pocket muffin recipe.

KBwB-BFlower-50Ok I shared mine, now you share yours! What was your biggest baking or cooking disaster? Bare it all below, or email me and we can keep it between us.

Wanna see some of the recipes that have worked out for me? I’ve archived them all here, plus I have a whole roster of ideas waiting to be made on Pinterest. You can find where I get my cooking inspiration here and here, and if you’re new to this blog you may want to check out my philosophy on coping with stress here. (Spoiler alert: it’s baking.)

What’s on My Cookbook Shelf: Second Edition

I’ll be the first to admit that I’m a little old-fashioned. My organizing system is mostly paper-based, I like to send Christmas cards and handwritten notes, and I believe there’s some truth behind old adages. (That’s how they got to be sayings in the first place, right?!)

Cookbooks, too, seem like they’re becoming things of the past with the proliferation of cooking shows, recipe sits and foodie blogs. (Gulp.)

There’s something to be said, though, about the sheer pleasure of reading a physical cookbook. It’s not just about reading the recipes- it’s the layout, the photos and the stories that make reading a cookbook such a unique experience. They’re still my go-to source of inspiration whenever I’m looking to bake for the blog.

I share some of the titles that have a standing reservation on my bookshelf last year, but today I thought I’d share a few more recent additions that have been getting my taste buds going.

One of my favorite places in Toronto has finally published their first cookbook. Bobette and Belle, located in the up-and-coming neighborhood of Leslieville, is famous for its fabulous cupcakes and French macarons. I’ve yet to attempt any of their classic recipes, but if they turn out even half as decent as the originals, I just might have to open my own shop.

Further north of the city of Toronto is the region known as Muskoka, or what Torontonians like to call “cottage country”. We Canadians live for our cottages and summer homes, so it’s not surprising that Marty’s World Famous Bakery, located in the heart of it all, would become just that- world famous. Chef Marty’s specialty- the butter tart- is a Canadian favorite, but I’m personally head over heels for his carrot cake. It’s about the best I’ve ever tasted.

Some of the pleasure of poring over a cookbook is the photography and Hello Cupcake! doesn’t disappoint. Of course, it’s easy to take good photos if you have amazing art direction, and the cupcakes featured in this book pretty much put every cupcake I’ve made to shame.

I do a lot of baking, but I like reading cookbooks just as much, if only to gain inspiration. (I’m not a very ambitious cook, I’m afraid.) However, I have attempted a few recipes from David Rocco’s La Dolce Vita and they’re surprisingly simple, delicious and oh-so-Italian. Some of these dishes have even made it to my own cooking repertoire (which is saying something)

But I wasn’t always so adventurous- when I was first learning how to cook I relied heavily on The Joy of Cooking (which contains recipes for just about everything, including possum) and How to Cook Everything (which is geared towards a more modern crowd and to the best of my knowledge contains no possum). They might not be the most fascinating reads, or are the prettiest of cookbooks, but these ones were valuable to my culinary education and I’d recommend everyone get at least one of them- even if it’s just to brush up on the basics.

I love to read and I love sharing my favorite books with you. (For more reading inspiration click here or here.) Don’t forget to friend me on Goodreads either! Btw: These lists are totally my own creation and I was not paid or perked to share my opinions with you by any author or publishing company.