Baking with B: 7 Days of Christmas Treats: Date Pecan Bars

19bfp7cookies2-cookie7

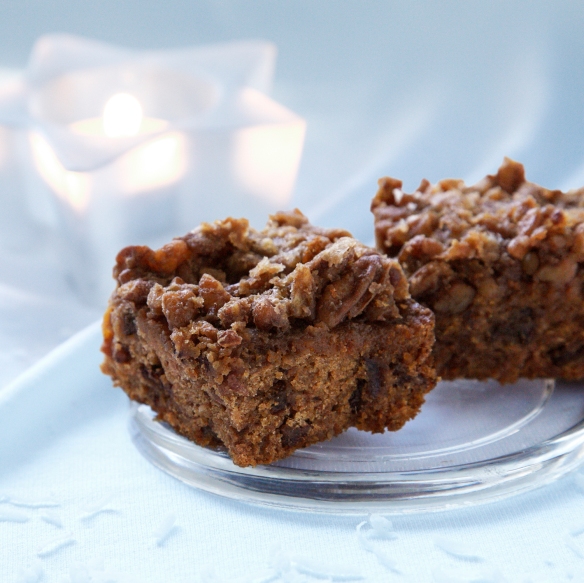
One of the worst things you can ask a baker to do is to make a recipe and then leave it alone, but trust me when I say that leaving these bars for a couple of days and giving them some space just might be the best thing you can do for them. The flavor soaks into everything, the topping solidifies and the result is a rich, nutty bar that I literally could not stop eating. (That is, of course, once I gave myself the chance.)

Date Pecan Bars (makes 36)

1 c. dates, chopped

1 tsp. baking soda

1/2 c. butter or margarine

3/4 c. boiling water

1/4 c. dark rum (or 2 tsp., 10 mL rum flavoring plus 1/4 c. water)

1 egg

1/2 c. granulated sugar

1 tsp vanilla

1 1/2 c. all-purpose flour

1 tsp. baking powder

Place dates in large mixing bowl. Sprinkle with baking soda and stir a bit to distribute. Add butter and boiling water. Continue to stir until butter has melted. Add rum, stir and set aside.

In small bowl beat egg, sugar and vanilla together well. Pour into date mixture. Measure in flour and baking powder. Stir well. Spread in greased 9×9-inch pan. Bake in 350F oven for 25 minutes. Remove from oven and spread with topping. Return to oven.

Topping:

1 c. brown sugar, packed

3 tbsp. butter or margarine

3 tbsp cream

1 c. chopped pecans

Crumble all ingredients together in bowl. As soon as you take squares out of the oven, spread over the top and return to oven for 15-20 minutes until golden brown. Cool. Cover with tight plastic or foil and put on an out of the way shelf in your cupboard so it can mellow out for a day or two.

Happy baking!

B

KBwB-Flower-50

Last year I counted down to Christmas by baking seven different types of Christmas cookies as per my favorite Swedish holiday tradition. This year I’m making it a thing, and sharing seven more delicious recipes with you. For more inspiration, you can check out more of my baking here. For even more recipe inspiration check out my Pinterest full of food eye candy that will have you licking your computer. Promise.

Baking with B: 7 Days of Christmas Treats: Midnight Mints

19bfp7cookies2-cookie3

Someone just told me that Nanaimo Bars are a Canadian thing (supposedly they were originally named for the place where they were invented- Nanaimo, B.C.). Am I a bad baker for not knowing this? Or a bad Canadian? Is this actually true? (Someone on the Internets please confirm. I’m dying to know.)

I’ve also read that Nanaimo Bars may also be called Millionaire Bars in the U.K. Is this also true? Are they the same thing?

No matter. I’ve always loved nanaimo bars and I love this minty version even more, especially because it was the one my mom used to make for the holidays when I was younger. Chocolate and mint is definitely a winning combination, which is why these bars win the award for baked goods that flew out of my house the fastest. (Thank goodness for hungry neighbors! They were gone in less than an hour.)

It sparked an interesting conversation among a few of us in the building on which families grew up eating the minty kind, and which families veered towards the more traditional recipe. I think both taste great, but you be the judge. Obviously, in this case, I’m very biased.

Midnight Mints (makes 36)

Bottom Layer

1/2 c. butter or margarine

1/4 c. granulated sugar

5 tbsp cocoa

1 egg, beaten

1 3/4 c. graham cracker crumbs

1/2 c. chopped walnuts

3/4 c. fine coconut


Middle Layer

1/3 c. butter or margarine

3 tbsp milk

1 tsp peppermint flavoring

2 c icing sugar

green food coloring


Top Layer

2/3 c. semisweet chocolate chips

2 tbsp. butter or margarine


To make the bottom layer, combine butter, sugar and cocoa in saucepan. Bring slowly to a boil. Stir in egg to thicken. Remove from heat. Stir in crumbs, nuts and coconut. Pack very firmly into greased 9×9-inch pan.

To make the middle layer, combine butter, milk, flavoring and icing sugar in bowl. Beat together well. Tint a pretty green. Spread over first layer.

To make the top layer, melt chocolate chips and butter in saucepan over low heat or hot water. Spread over second layer. Chill and store covered in refrigerator. This will keep well and will also freeze well. Cut into squares.

B’s Tip: These bars keep up to a week in the fridge but are probably best eaten within 2-3 days (if there’s any leftover!)

Happy baking!

B

KBwB-Flower-50

Last year I counted down to Christmas by baking seven different types of Christmas cookies as per my favorite Swedish holiday tradition. This year I’m making it a thing, and sharing seven more delicious recipes with you. For more inspiration, you can check out more of my baking here. For even more recipe inspiration check out my Pinterest full of food eye candy that will have you licking your computer. Promise.

Baking with B: 7 Days of Christmas Treats: Butterscotch Bars

19bfp7cookies2-cookie2

Do you find yourself scrambling to figure out what to make leading up to the Christmas holidays? Me too. It’s not so much a mater of not knowing what to serve- it’s having to pick and choose! There are so many tasty ideas for holiday foods out there- but what really gets me going is all that Christmas baking.

Part of my background is Swedish so holiday baking is a huge must in our family. It’s a tradition every year around Christmastime to bake seven different kinds of cookies. Why this is a tradition I have no idea but I can’t complain- I love to bake and I love to eat, so everybody wins as far as I’m concerned!

As we begin our countdown to Christmas, I’ll be sharing seven of some of my favorite cookie recipes so that you can get some ideas on what to bring- and what to eat- at your upcoming holiday dinner.

First up are these nummy butterscotch bars which I’m convinced should be a staple in every baker’s repertoire not just for the holidays, but all year round. Definitely a crowd-pleaser!

Butterscotch Bars (makes 36)

Bottom Layer:

whole graham crackers


Middle Layer:

3/4 c. butter or margarine

2/3 c. brown sugar, packed

1/2 c. milk

1 tsp. vanilla

1 1/4 c. graham cracker crumbs


Top Layer:

1 1/2 c. icing sugar

3 tbsp butter or margarine

1 1/2 tbsp water

1/2 tsp vanilla

Line ungreased 9×9-inch pan with whole graham crackers, trimming to fit. Combine butter, sugar, milk and vanilla in large saucepan. Bring to boil and simmer for 5 minutes. Remove from heat and stir in crumbs before pouring over crackers in the pan. Cover with layer of whole crackers, trimming to fit.

While the squares are cooling, beat together ingredients for icing in a small bowl. Add more water or icing sugar until mixture is spreadable, not runny. Use to ice squares once fully cooled. Cut into 36 squares and enjoy!

B’s Tip: This recipe keeps up to one week in the fridge and tastes even better once you’ve let it sit for a couple of days.

Happy baking!

B

KBwB-Flower-50

Last year I counted down to Christmas by baking seven different types of Christmas cookies as per my favorite Swedish holiday tradition. This year I’m making it a thing, and sharing seven more delicious recipes with you. For more inspiration, you can check out more of my baking here. For even more recipe inspiration check out my Pinterest full of food eye candy that will have you licking your computer. Promise.

Baking with B: Pretzel Shortbread Bars

16bfp-prtzlshrtbrd-1500

There’s just something about the combination of salty and sweet that’s just so addictive; I can’t describe it. I’m not really into anything like chocolate-covered potato chips (my tastes often veer towards the traditional) but anything that involves salted caramel, or anything like these tasty bars below is totally my jam. Or my salt. Or whatever.

Pretzel-Shortbread Bars (makes about 2 dozen)

3 1/4 cups salted miniature twist pretzels

1/2 cup all-purpose flour

1/2 teaspoon baking powder

1/2 c. unsalted butter, room temperature

1/2 cup sugar

1 large egg yolk

Preheat oven to 325F. While it’s pre-heating, pulse 1 ¾ c. pretzels in a food processor until powdery. Transfer 1/2 cup to a bowl; discard any remaining pretzel powder. Stir in flour and baking powder. Transfer remaining 1 1/2 cups pretzels to food processor, and pulse a few times until coarsely chopped.

B’s Tip: Don’t have a food processor? Do it the old-fashioned way like I did and crush the pretzels a handful at time by placing them in a sealed Ziploc bag and grinding them down with a potato masher. To make the powder, strain crushed pretzels through a sieve. Just return any remaining pretzel pieces to the bag and repeat the process until you have enough pretzel powder to mix in with your flour.

In a separate bowl, beat butter and sugar until pale and fluffy. Beat in egg yolk, then pretzel-flour mixture, bit by bit until well combined. Mix in 1/2 cup chopped pretzels. Grease a 4 1/4-by-13 1/2-inch fluted tart pan or pie plate and line the bottom with parchment. Press dough evenly into pan and top dough with 1/4 cup chopped pretzels, pressing slightly. Discard any remaining pretzels. Bake until pale brown and firm in the center, 25 to 30 minutes. Transfer pan to a wire rack, and let shortbread cool for 1 hour. Remove shortbread from pan, and cut into 1/2-inch-wide rectangles using a serrated knife.

B’s Tip: If you’re super organized and want to get things done ahead of time you can store these babies at room temperature for up to one week.

I have to admit- this was my first time making shortbread and it actually ended up being way easier than I thought. Sure, this recipe requires a fair amount of assembling, but the most difficult part was keeping them out of my mouth long enough to let my photographer shoot them for the blog!

Happy baking!

B

KBwB-BFlower-50

Baking with B appears every other Monday on the Keeping Busy with B Blog. Find out why I like baking so much here. For more of my baking, click here. And for even more recipe inspiration, check out my Pinterest full of food eye candy that will have you licking your computer. Promise.

Baking with B: White Chocolate Fudge Bars

You guys know me and how I’m just a wee bit obsessed with brownies. My love affair started with chocolate, and continued with these butterscotch ones my mom used to make, and evolved so that I adapted the chocolate brownie recipe to suit the dietary needs of my vegan friends. Of course, this hasn’t stopped me from experimenting with even more flavor combinations (maybe I’ll share some more in an upcoming post?) but for now I couldn’t resist trying this chocolate, fudgey variety that taste just as good as they sound.

White Chocolate Fudge Bars (makes 16)

1/2 cup unsalted butter

8oz white chocolate chips (or your favorite white chocolate bar)

3/4 cups granulated sugar

2 eggs

1/2 teaspoon salt

1 teaspoon vanilla extract

1 cup all purpose flour

Preheat oven to 350F. Melt the butter with the white chocolate using a double boiler, by heating it in a glass bowl in the microwave, or by making your own makeshift double boiler.

B’s Tip: To make your own double-boiler, fill a small saucepan a third of the way full with water. Set a bowl on top (not plastic) and make sure it’s big enough to rest on the rim of the pot without fully being immersed in the water at the bottom. Place the butter and white chocolate in the bowl. Bring the saucepan to a boil on the stove. Stir gently and watch the mixture melt like magic!

Add sugar to the butter/chocolate mixture and mix well. Mix in the salt, vanilla, and eggs until incorporated. Stir in flour until well combined. Spread batter into a greased 8″ pan. Bake for 28 minutes. Let cool completely before cutting into squares.
Happy baking!

B

KBwB-BFlower-50

Baking with B appears every other Monday on the Keeping Busy with B Blog. Find out why I like baking so much here. For more of my baking, click here. And for even more recipe inspiration, check out my Pinterest full of food eye candy that will have you licking your computer. Promise.