Baking with B: Andi’s Gluten-Free Cranberry Almond Biscotti

19cranorangebisc-final

Andi is a neighbor of mine and one of the people that I admire most in this world: she carries herself with such poise and grace that it almost makes me envy her; and you’d hate her for how smart, beautiful and accomplished she is except that she’s so kind-hearted you kind of have to love her anyways.

So when I was making my neighbors some goody bags for Christmas, I felt badly for excluding Andi because of her gluten-free diet. She’s always lamenting that she never gets to try any of the things that I make, so I decided it was time to make her something of her own.

Having not ever made biscotti before-combined with being unfamiliar with many of the GF flours out there- made me a little bit nervous. The results were golden and a little bit spicy, but for some reason retained a slightly chewy texture in the middle that was decidedly delicious, but decidedly un-biscotti like. (Psst. Here’s the part where you email me with your gluten-free, biscotti-making advice.)

Still, I liked them enough to try them again and include them in my baking repertoire. The almond flour gives it an even nuttier flavor that’s not too sweet, and it goes perfectly with a strong Italian espresso.

Andi’s Gluten-Free Cranberry Almond Biscotti (makes 12)

(based on a recipe I originally found here)

2 large eggs

1/3 c. honey

zest from one orange

1 1/2 c. almond flour

2 tbsp arrowroot flour

1/2 tsp baking soda

1/4 tsp sea salt

1/2 c. dried cranberries

1/2 almonds, sliced

In a medium bowl, combine eggs, honey and orange zest and beat until frothy. Add flours, baking soda and sea salt to the bowl and mix until a dough forms. Add cranberries and almonds and stir to combine.

Spoon out dough onto a parchment-lined cookie sheet and use fingers to shape it into a long rectangle, approximately 4×12 inches. (B’s Tip: The dough will be sticky, gooey and hard to manipulate so you can always use the back of a spoon that’s been dipped in cold water to help shape your rectangle.) Make sure to leave room on all sides as the dough will spread as it cooks.

Bake dough in oven that’s been preheated to 350F for approximately 20 minutes or until golden. Remove from the oven and let cool for 1 hour. Once cooled, slice your log on a diagonal to get those long, angular biscotti shapes (about 1″ thick). Lay biscotti on their sides and return to oven for an additional 15-20 minutes until crunchy.

B’s Tip: Believe me, it’s hard to wait for the biscotti to cool before slicing them but trust me- they’re much easier to slice if you do and they need that drying-out time to get that crunchy consistency. Make the process go faster by placing your cookie tray on a raised cooling rack to get the air flowing underneath it, and keep them far away from your warm oven!

Happy baking!

B

KBwB-Flower-50Baking with B appears every other Monday on the Keeping Busy with B Blog. Find out why I like baking so much here. For more of my baking, click here. And for even more recipe inspiration, check out my Pinterest full of food eye candy that will have you licking your computer. Promise.

Baking with B: 7 Days of Christmas Treats: Butterscotch Confetti

19bfp7cookies2-cookie1

This recipe is probably one of the easiest recipes I’ve ever made on my blog, and definitely one of the prettiest. I’m not always a fan of butterscotch chips- sometimes I find them just way too sweet- but when you throw in salty peanut butter and fluffy marshmallows the result ends up sleek and smooth, and melts in your mouth. The only challenging part of this recipe is going to be preventing yourself from eating all of these babies before the holidays arrive.

Butterscotch Confetti (makes 36)

1/4 c. butter or margarine

1/2 c. peanut butter

1 c. butterscotch chips

8 oz. small colored marshmallows

Melt butter and peanut butter in a large saucepan over low heat. Stir in chips until melted. Cool until you can hold your hand on bottom of pot. To speed process, stir while holding pan in cold water until cool enough. Add marshmallows and stir until all are coated. If you like, add 1/2 c. chopped walnuts and/or 1/2 c. medium coconut to mix things up and add a little bit of bite. Pack down in a 9×9-inch pan that has been lined with wax paper. Refrigerate for up to two weeks in an airtight container.

B’s Tip: The original recipe calls for a 9×9-pan but you may want to experiment with different sizes and shapes of pans to create a shape that works best for you. Honestly? I would have preferred a thicker square and may try using an 8×8-inch pan next time.

Happy baking!

B

KBwB-Flower-50

Last year I counted down to Christmas by baking seven different types of Christmas cookies as per my favorite Swedish holiday tradition. This year I’m making it a thing, and sharing seven more delicious recipes with you. This is the last post in this year’s series, but for more inspiration, you can check out more of my baking here. For even more recipe inspiration check out my Pinterest full of food eye candy that will have you licking your computer. Promise.

Baking with B: 7 Days of Christmas Treats: Pineapple Log

19bfp7cookies2-cookie6

Sometimes you don’t know how a recipe turns out and you just have to go for it. Vanilla, pineapple and cream cheese don’t necessarily sound like the most appealing flavors individually, but when they come together in this chewy little number the result tastes like piña colada-flavored fudge. It’s more sweet than fruity, and you can’t taste the cream cheese at all.

Just because a recipe turns out surprisingly good doesn’t mean it’s also surprisingly easy. Sometimes these no-bake recipes require following instructions to the letter, so here’s a few words from the wise:

  • Do make sure your cream cheese is at room temperature before even attempting to beat. You may want to try breaking it up in cubes first to make your life easier, or even better, use a beater with a paddle attachment to make the cream cheese light and fluffy.
  • Don’t buy vanilla wafers thinking you can make your own vanilla wafer crumbs as easily as you can with graham crackers. They’re tough to crumble on their own without a food processor, and the recipe requires the crumbs be superfine for the best blending.
  • Do drain the pineapple within an inch of its life. The recipe does not require the extra moisture and adding too much icing sugar to compensate can turn these cookies very sweet, very quickly.
  • Don’t cut your marshmallows without a glass of cold water by your side for rinsing off your scissors. The marshmallows will get sticky and end up gumming up the blades of your scissors when you cut them. (Maybe some brave soul will attempt this recipe with marshmallow fluff and let me know what they think?)

Try this recipe if you dare- and if you want a little taste of the tropical this holiday season, I definitely think it’s worth the risk!

Pineapple Log (makes approximately 48 slices)

4 oz. cream cheese

2 1/2 c. icing sugar

1 c. vanilla wafer crumbs

1/4 tsp salt

1/2 c. crushed pineapple, drained

1/2 c. tiny colored marshmallows, cut into quarters (use scissors)

shredded coconut

Beat cheese until smooth. Add sugar, crumbs, salt and pineapple. After mixing together well, if this seems very soft, work more crumbs or icing sugar into the batter keeping in mind that it won’t get much firmer when chilled. The amount extra that you will need depends on how well you drained the pineapple. Now mix in the marshmallows. Shape into log and roll in shredded coconut. Chill. Slice to serve.

Happy baking!

B

KBwB-Flower-50

Last year I counted down to Christmas by baking seven different types of Christmas cookies as per my favorite Swedish holiday tradition. This year I’m making it a thing, and sharing seven more delicious recipes with you. For more inspiration, you can check out more of my baking here. For even more recipe inspiration check out my Pinterest full of food eye candy that will have you licking your computer. Promise.
Baking with B: 7 Days of Christmas Treats: Marshmallow Roll

19bfp7cookies2-cookie5

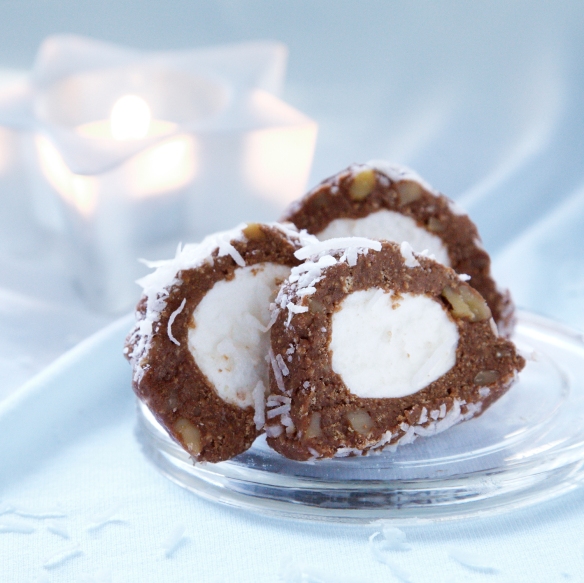
I loved making this cookie simply because of the way it looks- the marshmallow inside reminds me of a little snowball and the coconut coating gives this cookie a light dusting of faux snow.

Just because these marshmallow rolls look so sweet doesn’t mean they actually taste that sweet- using unsweetened chocolate gives this recipe a fudgey flavor and the graham cracker crumbs give it a salty undertone (even if you do opt to go without the nuts).

Marshmallow Roll (makes approximately 24 slices)

2 squares of unsweetened chocolate

10 oz. sweetened condensed milk

2 c. graham cracker crumbs

1/2 c. walnuts, finely chopped

large colored marshmallows

coconut

Melt in chocolate in large saucepan over low heat or hot water. Remove from heat. Stir in milk, crumbs and nuts. Divide into 2 portions. On piece of wax paper press out 1 portion 1/4-inch thick. Form into wide enough shape to go around marshmallow. Place various colors of marshmallow end to end and bring up batter to go around, pinching dough to join.

B’s Tip: Do make sure that you’re generous when measuring out the graham cracker crumbs- this dough is incredibly sticky and hard enough to handle as it is! P.S. Wax paper is also a must for easier rolling and clean up.

Coat with coconut. Repeat for other half. Wrap in wax paper. Store in plastic wrap in refrigerator. Cut with knife dipped in water. Clean knife between cuts. Slice thinly to serve.

B’s Tip: These recipe can be stored up for up to a week in an airtight container in the refrigerator. If you can stand it, wait another 24 hours after slicing to try for an even chewier treat.

Happy baking!

B

KBwB-Flower-50

Last year I counted down to Christmas by baking seven different types of Christmas cookies as per my favorite Swedish holiday tradition. This year I’m making it a thing, and sharing seven more delicious recipes with you. For more inspiration, you can check out more of my baking here. For even more recipe inspiration check out my Pinterest full of food eye candy that will have you licking your computer. Promise.
Baking with B: 7 Days of Christmas Treats: Date Pecan Bars

19bfp7cookies2-cookie7

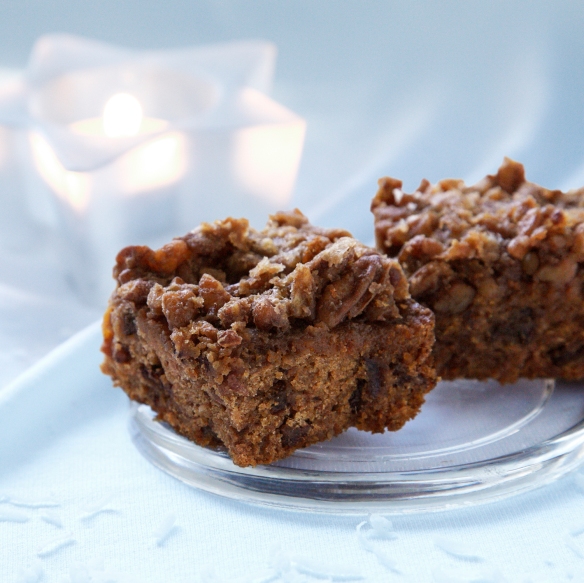
One of the worst things you can ask a baker to do is to make a recipe and then leave it alone, but trust me when I say that leaving these bars for a couple of days and giving them some space just might be the best thing you can do for them. The flavor soaks into everything, the topping solidifies and the result is a rich, nutty bar that I literally could not stop eating. (That is, of course, once I gave myself the chance.)

Date Pecan Bars (makes 36)

1 c. dates, chopped

1 tsp. baking soda

1/2 c. butter or margarine

3/4 c. boiling water

1/4 c. dark rum (or 2 tsp., 10 mL rum flavoring plus 1/4 c. water)

1 egg

1/2 c. granulated sugar

1 tsp vanilla

1 1/2 c. all-purpose flour

1 tsp. baking powder

Place dates in large mixing bowl. Sprinkle with baking soda and stir a bit to distribute. Add butter and boiling water. Continue to stir until butter has melted. Add rum, stir and set aside.

In small bowl beat egg, sugar and vanilla together well. Pour into date mixture. Measure in flour and baking powder. Stir well. Spread in greased 9×9-inch pan. Bake in 350F oven for 25 minutes. Remove from oven and spread with topping. Return to oven.

Topping:

1 c. brown sugar, packed

3 tbsp. butter or margarine

3 tbsp cream

1 c. chopped pecans

Crumble all ingredients together in bowl. As soon as you take squares out of the oven, spread over the top and return to oven for 15-20 minutes until golden brown. Cool. Cover with tight plastic or foil and put on an out of the way shelf in your cupboard so it can mellow out for a day or two.

Happy baking!

B

KBwB-Flower-50

Last year I counted down to Christmas by baking seven different types of Christmas cookies as per my favorite Swedish holiday tradition. This year I’m making it a thing, and sharing seven more delicious recipes with you. For more inspiration, you can check out more of my baking here. For even more recipe inspiration check out my Pinterest full of food eye candy that will have you licking your computer. Promise.

Baking with B: 7 Days of Christmas Treats: Chocolate Roll


19bfp7cookies2-cookie4

Take it from me- there is no way that you can mess this recipe up. It feels like taking everything that tastes sweet and good in your pantry and throwing it all into one fudgey slice of a cookie. The sheer amount of stuff in it makes it tricky to roll-putting it together just feels like throwing lumps of dough onto a pan- but once you’ve molded it into a nice shape, it looks pretty no matter what. I bet this would be a blast to make with kids.

Chocolate Roll (makes approximately 24 slices)

1 c. semisweet chocolate chips

2 tbsp butter or margarine

1 egg, beaten

1 c. icing sugar

1 1/2 c. small colored marshmallows

1/2 c. maraschino cherries, well-drained and quartered

1/2 c. chopped walnuts

coconut for topping

Melt chips and butter in a large heavy saucepan over low heat. Remove from heat. Add beaten egg, icing sugar, marshmallows, cherries and walnuts. Stir to mix. Cool if very warm. Form mixture into a roll. Sprinkle some coconut over countertop, in space big enough to move around to coat with coconut. Wrap in either wax paper or plastic wrap. Chill well before attempting to slice. Slice thinly with clean, sharp knife.

B’s Tip: I ended up using glaçe cherries instead of maraschino cherries and they ended up working just as well because of their ooey-gooey sweetness.

Happy baking!

B

KBwB-Flower-50

Last year I counted down to Christmas by baking seven different types of Christmas cookies as per my favorite Swedish holiday tradition. This year I’m making it a thing, and sharing seven more delicious recipes with you. For more inspiration, you can check out more of my baking here. For even more recipe inspiration check out my Pinterest full of food eye candy that will have you licking your computer. Promise.

Baking with B: 7 Days of Christmas Treats: Midnight Mints

19bfp7cookies2-cookie3

Someone just told me that Nanaimo Bars are a Canadian thing (supposedly they were originally named for the place where they were invented- Nanaimo, B.C.). Am I a bad baker for not knowing this? Or a bad Canadian? Is this actually true? (Someone on the Internets please confirm. I’m dying to know.)

I’ve also read that Nanaimo Bars may also be called Millionaire Bars in the U.K. Is this also true? Are they the same thing?

No matter. I’ve always loved nanaimo bars and I love this minty version even more, especially because it was the one my mom used to make for the holidays when I was younger. Chocolate and mint is definitely a winning combination, which is why these bars win the award for baked goods that flew out of my house the fastest. (Thank goodness for hungry neighbors! They were gone in less than an hour.)

It sparked an interesting conversation among a few of us in the building on which families grew up eating the minty kind, and which families veered towards the more traditional recipe. I think both taste great, but you be the judge. Obviously, in this case, I’m very biased.

Midnight Mints (makes 36)

Bottom Layer

1/2 c. butter or margarine

1/4 c. granulated sugar

5 tbsp cocoa

1 egg, beaten

1 3/4 c. graham cracker crumbs

1/2 c. chopped walnuts

3/4 c. fine coconut


Middle Layer

1/3 c. butter or margarine

3 tbsp milk

1 tsp peppermint flavoring

2 c icing sugar

green food coloring


Top Layer

2/3 c. semisweet chocolate chips

2 tbsp. butter or margarine


To make the bottom layer, combine butter, sugar and cocoa in saucepan. Bring slowly to a boil. Stir in egg to thicken. Remove from heat. Stir in crumbs, nuts and coconut. Pack very firmly into greased 9×9-inch pan.

To make the middle layer, combine butter, milk, flavoring and icing sugar in bowl. Beat together well. Tint a pretty green. Spread over first layer.

To make the top layer, melt chocolate chips and butter in saucepan over low heat or hot water. Spread over second layer. Chill and store covered in refrigerator. This will keep well and will also freeze well. Cut into squares.

B’s Tip: These bars keep up to a week in the fridge but are probably best eaten within 2-3 days (if there’s any leftover!)

Happy baking!

B

KBwB-Flower-50

Last year I counted down to Christmas by baking seven different types of Christmas cookies as per my favorite Swedish holiday tradition. This year I’m making it a thing, and sharing seven more delicious recipes with you. For more inspiration, you can check out more of my baking here. For even more recipe inspiration check out my Pinterest full of food eye candy that will have you licking your computer. Promise.
Baking with B: 7 Days of Christmas Treats: Butterscotch Bars

19bfp7cookies2-cookie2

Do you find yourself scrambling to figure out what to make leading up to the Christmas holidays? Me too. It’s not so much a mater of not knowing what to serve- it’s having to pick and choose! There are so many tasty ideas for holiday foods out there- but what really gets me going is all that Christmas baking.

Part of my background is Swedish so holiday baking is a huge must in our family. It’s a tradition every year around Christmastime to bake seven different kinds of cookies. Why this is a tradition I have no idea but I can’t complain- I love to bake and I love to eat, so everybody wins as far as I’m concerned!

As we begin our countdown to Christmas, I’ll be sharing seven of some of my favorite cookie recipes so that you can get some ideas on what to bring- and what to eat- at your upcoming holiday dinner.

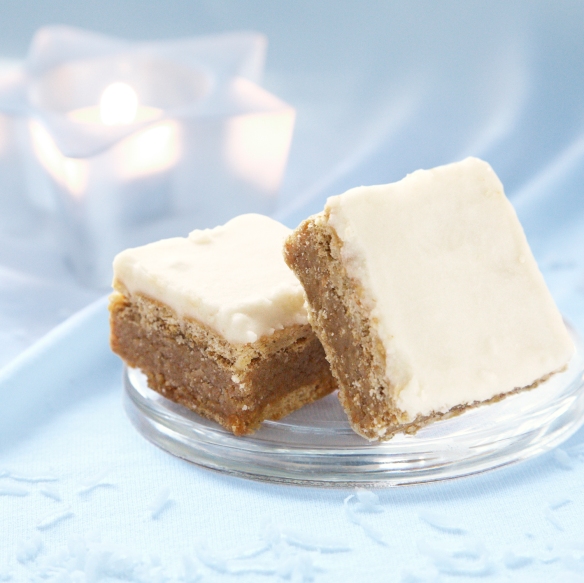
First up are these nummy butterscotch bars which I’m convinced should be a staple in every baker’s repertoire not just for the holidays, but all year round. Definitely a crowd-pleaser!

Butterscotch Bars (makes 36)

Bottom Layer:

whole graham crackers


Middle Layer:

3/4 c. butter or margarine

2/3 c. brown sugar, packed

1/2 c. milk

1 tsp. vanilla

1 1/4 c. graham cracker crumbs


Top Layer:

1 1/2 c. icing sugar

3 tbsp butter or margarine

1 1/2 tbsp water

1/2 tsp vanilla

Line ungreased 9×9-inch pan with whole graham crackers, trimming to fit. Combine butter, sugar, milk and vanilla in large saucepan. Bring to boil and simmer for 5 minutes. Remove from heat and stir in crumbs before pouring over crackers in the pan. Cover with layer of whole crackers, trimming to fit.

While the squares are cooling, beat together ingredients for icing in a small bowl. Add more water or icing sugar until mixture is spreadable, not runny. Use to ice squares once fully cooled. Cut into 36 squares and enjoy!

B’s Tip: This recipe keeps up to one week in the fridge and tastes even better once you’ve let it sit for a couple of days.

Happy baking!

B

KBwB-Flower-50

Last year I counted down to Christmas by baking seven different types of Christmas cookies as per my favorite Swedish holiday tradition. This year I’m making it a thing, and sharing seven more delicious recipes with you. For more inspiration, you can check out more of my baking here. For even more recipe inspiration check out my Pinterest full of food eye candy that will have you licking your computer. Promise.

Baking with B: Classic Chocolate Fudge

Everyone should know how to make chocolate fudge, everyone, because it’s one of those recipes that seems way harder than it actually seems. All of your friends will be impressed by your super-awesome candy-making skills and you’ll get the satisfaction of knowing you made a sweet treat in less time then it will take you to burn off the calories from one piece.

Classic Chocolate Fudge (makes 64 squares)

500 g. (about 3 ½ c.) best quality dark, milk or white chocolate, coarsely chopped

300 mL can sweetened condensed milk

Line the bottom and sides of a 8×8-inch pan with 2 overlapping pieces of plastic wrap, letting wrap half over sides of pan. Combine chocolate and milk a large microwave-safe bowl. Microwave, uncovered, on medium setting halfway through until chocolate is almost melted, 3-4 minutes. Remove and stir until evenly mixed and smooth. Scrape mixture into prepared pan and press down, smoothing top. Fold overhanging ends of plastic wrap over fudge to completely cover. Refrigerate at least 2 hours or overnight. Fudge keeps well, refrigerated, for up to 1 week.

Happy baking!

B

KBwB-BFlower-50Baking with B appears every other Monday on the Keeping Busy with B Blog. Find out why I like baking so much here. For more of my baking, click here. And for even more recipe inspiration, check out my Pinterest full of food eye candy that will have you licking your computer. Promise.

C is for Cookie

cookie-recipe-collaboration

Cookies don’t last long at my place, and I hear it’s a problem in other households as well. It’s easy to see why they’re so popular- cookies are so small and inoffensive that it’s easy to fool yourself into thinking that you’re just going to have one. The next thing you know, you’ve eaten half a dozen (and that’s just for breakfast!).

Tell me I’m not the only one that’s done that. Please.

So you understand now why it was pure torture for me participating in this week’s bake-off hosted by Sweet Spell. (Wanna see what we did last week? Click here for some outta-this-world cakes.) It was hard enough picking a recipe from my archive and the other contributions are all so delicious that the thought of them all in one place is enough to turn me into a blue, fuzzy monster. (We all know which one I’m talking about.)

Call me old-fashioned, but these Classic Oatmeal Cookies are still one of my go-to comfort foods, which is why I contributed it to our collection. Here’s what some of the other cookie monsters have been up to: (clockwise from top left)

These Shortbread Flower Cookies from I Want to Be a Cook are almost too pretty to eat, but you guys know that I love anything involving flowers.

Chiara’s Cream Cookie recipe over at Chiara’s Baking sounds so light and simple that I’m actually thinking about baking them this afternoon.

If you’re all about that chocolate, Natalie’s recipe for Triple Chocolate Cookies on her blog, Natalie Autumn, will satisfy your need. The peanut butter chips just make the whole thing!

I’m all sorts of jealous about Sweet Spell’s wicked baking skills especially when it comes to these Chocolate Shell Butter Cookies. My attempts at piped cookies have been nowhere near as good.

Pumpkin Pie and Me contributed a recipe for Chocolate Chip Toffee Cookies that sounds ooey-gooey-good. Plus it’s just in time for Halloween!

If you’re in the mood for something completely different, Foodie on Board’s Olive, Rosemary and Parmesan Sablés sound like the perfect savory cookie to show off at your next gathering. I bet they’d also make great gifts.

Oh hey! There’s my Oatmeal Cookies again…how did those get in there?

Last but not least, The Recipe Hunter shared her tried, tested and true recipe for Chocolate Cookies. Yes, those are chocolates melted on top of the cookies. Yes, I’m already thinking of ways to use up leftover Halloween candy. (Who am I kidding? There’s never any leftover Halloween candy.)


Many thanks to Sweet Spell for once again rounding up a great collection of recipes (and great bloggers!) It’s a great way to make new blogging friends, so if you’d like to participate in a future link-up party give me a shout at keepingbusyb@gmail.com. I always love to hear from and/or drool over your baking pictures!

KBwB-BFlower-50

Original baking party post found here. For our cake round-up, click here. My column Baking with B usually appears every other Monday on the Keeping Busy with B Blog. I hope you’ll join me for the next one!