Baking with B: Cappuccino Cupcakes

BFoodPix-ChocMuff1-031-1500

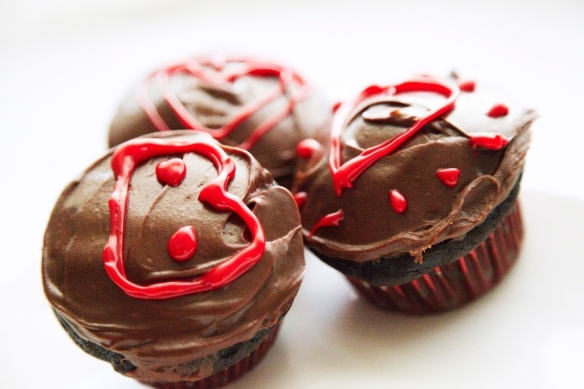
Don’t be fooled by these tasty little fellas. They’re masquerading as chocolate cupcakes but they’ve taken on a little more of a grown-up flavor. No, there’s no booze in them (although that might be an interesting experiment) but is there espresso powder which probably means they’re not that appropriate for the kiddos. Or maybe you’re baby-sitting and want to return the kids full of sugar and caffeine. In that case, I give you permission to bake away. Nothing goes better with coffee than chocolate anyway.

Cappuccino Cupcakes (makes 24)

1 c. butter

1 3/4 c. sugar

4 large eggs plus 2 large egg yolks

1 tbsp vanilla extract

3 c. cake flour (spooned and leveled)

1 tbsp baking powder

1/2 tsp salt

1/2 c. buttermilk

3 tbsp espresso powder

1 c. semisweet chocolate, finely chopped

Bring cold ingredients to room temperature before starting to mix your batter. Preheat oven to 350F. Grease or line 24 standard muffin cups. In a large bowl, cream together butter and sugar. Beat in eggs and yolks, one at a time, until combined. Beat in vanilla. In another large bowl, whisk together cake flour, baking powder and salt. Add 1/3 c. of the dry ingredients to wet ingredients, beating to combine. Beat in 3/4 c. buttermilk, another 1/3 c. of the flour mixture and alternate between buttermilk and flour mixture until all ingredients are combined. Do not overmix.

In a small bowl, combine espresso powder and 2 tsp hot water. Stir espresso and chopped chocolate into batter and divide among muffin cups. Bake until a toothpick inserted in the center comes out clean, about 20 minutes, rotating halfway through. Let cool in pans first, about 5 minutes before transferring to racks.

B’s Tip: You can use whichever icing recipe you like, but my particular favorite for this recipe is just straight up chocolate. For an extra caffeine kick, you may want to try mixing it in with extra coffee or espresso.

Happy baking!

B

KBwB-Flower-50


Baking with B (usually) appears every other Monday on the blog. I just love cupcakes though, which is why I’m feeling extra generous this week. Find proof on just how crazy I am about cupcakes here. Find out why I like baking so much here. For more of my baking, click here. And for even more recipe inspiration, check out my Pinterest full of food eye candy that will have you licking your computer. Promise.

Making cupcakes for a crowd? Never fear. I shared my method on how do it here. Want more cupcake recipes? I’ve got some delicious ones here.

Baking with B: Lucy’s Chocolate Chocolate Cake


KBB_chopped_chocolate

Somehow (somehow!) I was roped into making a birthday cake for one of the office staff.

Okay. So it wasn’t really that hard to convince me. And when my co-worker Lucy requested that her cake could be anything that was “chocolate chocolate” (that is, chocolate cake with chocolate icing), I was totally game.

And don’t even try to tell me that it should be “double chocolate”. She asked for “chocolate chocolate” and I think I delivered.

KBB_baking_chocolate_chocolate_cakeLucy’s Chocolate Chocolate Cake (serves 8)

2 oz./55g semisweet chocolate, chopped

2 tbsp milk

1 1/2 c. all-purpose flour

1 tbsp baking powder

3/4 c. unsalted butter, softened

generous 1/4 c. dark brown sugar

3 eggs, beaten

1 tsp vanilla extract

Filling and Frosting

31/2 oz./100 g semisweet chocolate, chopped

4 tbsp unsalted butter, softened

1 1/2 c. icing sugar

1 tsp vanilla extract

1 tbsp milk

Preheat the oven to 350F. Grease a 9-inch round cake pan and line with parchment paper.

First, take a picture of the chopped chocolate and post it on Instagram just to be a huge tease. When you’re done gloating about how many likes your picture got (you’re welcome), gently heat the chocolate and milk in a saucepan just until melted, without boiling. Remove from heat.

Sift the flour and baking powder together and add the butter, brown sugar, eggs and vanilla extract. Beat well until smooth, then stir in the melted chocolate mixture.

Spoon the batter into pan smooth level. Bake for 50-60 minutes, or until firm to the touch and just beginning to shrink away from the sides of the pan.

Let cool in the pan for 10 minutes, then turn out onto wire racks to finish cooling. When cold, carefully slice the cake horizontally into 2 layers.

B’s Tip: For the love of all that is good, please test all your willpower and do not try to cut the cake before it has cooled! I learned that the hard way- my first round of this cake got totally smooshed.

For the filling and frosting, melt the chocolate with the butter in a small pan over low heat. Remove from the heat and stir in the confectioner’s sugar, vanilla extract, and milk, then beat well until smooth.

Sandwich the cake layers together with half the chocolate mixture, then spread the remainder on top of the cake, swirling with a spatula. Sprinkle with leftover grated chocolate, if desired.

I substituted milk with cream with no difficulties (so sue me, I was all out!) and instead of a layered option I used the extra icing to frosting the sides of the cake as well. The result? A rich, chocolatey cake with a dense, moist texture. It keeps in the fridge wonderfully if you’re making it ahead of time- just remember to cover with tin foil and let rest at room temperature a few minutes before serving.

Lucy said that it was everything she wanted and the rest of the office seemed pleased as punch, too. Considering my first stab at this recipe turned out a disaster, I was pretty happy with the results too. I’m definitely not waiting until Lucy’s next birthday to try this cake again!

Happy baking!

B

KBwB-Flower-50

Baking with B appears every other Monday on the Keeping Busy with B Blog. Find out why I like baking so much here. For more of my baking, click here. And for even more recipe inspiration, check out my Pinterest full of food eye candy that will have you licking your computer. Promise.