Baking with B: Amy’s Classic Lemon Squares

As we get older falling out of touch with old friends is a fact of life. Let’s face it: stuff happens. When we’re burdened with responsibilities we tend to pare life down to its essentials and sometimes it means losing contact with someone who was dear to us. Add in some misunderstandings and well, like I said…s#%! happens.

In my life, Amy is one of those people and once upon a time she asked me to make lemon squares for my blog because they’re her favorite. Luckily, a mutual friend of ours had a recipe that was tried, tested and true. We made some for her over the holidays and they were so good I thought I would share them with you as well. They’re super lemony without being too tart, and the buttery crust is surprisingly easy to make.

So cheers to you, Ameballs. We hope you liked your squares.

Amy’s Classic Lemon Squares (makes 36)

For the crust:

2 c. all-purpose flour

1/2 c. powdered sugar

2 tbsp cornstarch

1/4 tsp salt

3/4 c., plus 2 tbsp butter, chilled and cubed

For Filling:

4 eggs, lightly beaten

1 1/2 c. granulated sugar

3 tbsp all-purpose flour

1 tsp lemon zest

3/4 c. lemon juice

1/4 c. cream

powdered sugar (for dusting)

To make the crust, preheat oven to 350F. In a bowl combine flour, sugar, cornstarch and salt. Cut in butter until mixture is crumbly. Press mixture into the bottom of a greased 13x9x2 inch baking pan. Bake 18-20 minutes until the edges are golden.

While the crust is baking, prepare the filling: combine eggs, granulated sugar, flour, lemon zest, lemon juice and cream in a bowl. Remove crust from oven and pour filling over the top. Return to the oven to bake for 15-20 minutes more or until the center is set.

B’s Tip: Test if your lemon curd is set by giving it a little bit of a wiggle, wiggle. If it’s wobbly like Jello, it’s not quite ready.

Cool completely in pan on a wire rack before cutting into squares. Dust with powdered sugar, if desired. Cover and store in the refrigerator (or make them ahead of time and put them in the freezer!)

Baking with B appears every other Monday on the Keeping Busy with B Blog. Find out why I like baking so much here. For more of my baking, click here. And for even more recipe inspiration, check out my Pinterest full of food eye candy that will have you licking your computer. Promise.

This is one of those recipes that I would call a “classic”- one of those down-home, feel-good dishes that everyone should learn how to make! Find more timeless recipes like this click here.

Baking with B: Classic Rice Pudding with Fresh Raspberries

If any of you follow me and the saga of my porch garden on Instagram you’ll know that I have a couple of raspberry plants that over the summer have produced the occasional fruit. (To be honest, I didn’t have high expectations to begin with so I was happy I got any berries at all.)

Well, wouldn’t you know, mere days before October arrives, these little plants decide to wake up and grow raspberries like there’s no tomorrow. They’re pretty teensy and tart, but there’s a fresh crop coming out each day. However, I still didn’t have quite enough to bake with so I had to rack my brain to figure out what I could do with them.

Enter rice pudding: one of the greatest desserts to make when you have practically nothing in your pantry and you’re craving something sweet. It’s creamy with a hint of vanilla and it’s the perfect delivery method for sweet-tart raspberries (although really, I think any fruit will do).

Oh, and did I mention it’s actually pretty easy to make? See what I mean for yourself…

Classic Rice Pudding with Fresh Raspberries (makes approx. 4 servings)

(loosely based on the recipe found here)

3/4 c. uncooked white rice (short or medium grain is best)

2 c. milk

2 tbsp vanilla custard powder

1/3 c. white sugar

1/4 tsp salt

1 egg, beaten

1 tbsp butter

raspberries, to taste (or fruit of your choice)

Note: I used vanilla custard powder in this recipe because it gave me such a rich, creamy vanilla flavor. The original recipe suggests adding 1/2 tsp vanilla extract at the very end, which is perhaps a little more traditional than my method.

In a medium saucepan, bring 1 1/2 c. of water to boil. Add rice and let simmer on low, covered for approximately 20 minutes.

Whisk custard powder in with milk until dissolved. In a separate saucepan, bring 1 1/2 c. of milk to a slow boil, stirring occasionally to prevent scalding. Add in cooked rice and sugar, stirring to combine. Let simmer on low for 15-20 minutes until texture becomes quite thick.

B’s Tip: I suggest adding the sugar last to your mixture because I added it first while the milk is still heating up. That’s ok, too, but if you’re not watching it (and I wasn’t) the sugar will end up caramelizing and burning at the bottom of your pan, making it hotter than you really want it to be. On the bright side, I ended up with all these really delicious flakes of burnt sugar scattered throughout my pudding. It was a lemons-into-lemonade kind of situation.

Stir in remaining 1/2 c. milk (you may want to give it a slight whisk beforehand) and beaten egg. Stir to combine and let cook for two minutes more. Remove from heat and stir in butter. Let pudding sit for 10 minutes before serving. Scatter with raspberries (or fruit of your choice.

Rice pudding can be served hot or cold, but I prefer it slightly warm because that’s when the texture feels just right. (So creamy! So vanilla-y!) If you’re not a fan of rice pudding because all you’ve had is the gelatinous, cold stuff from the grocery store, I ask you to try this recipe and reconsider. It may have a reputation as a dessert for the elderly, but I think you’ll find it’s actually delicious for all ages.

Happy baking!

B

Baking with B appears (usually) every other Monday on the Keeping Busy with B Blog. Find out why I like baking so much here. For more of my baking, click here. And for even more recipe inspiration, check out my Pinterest full of food eye candy that will have you licking your computer. Promise.

The Legend of the Book of Yum

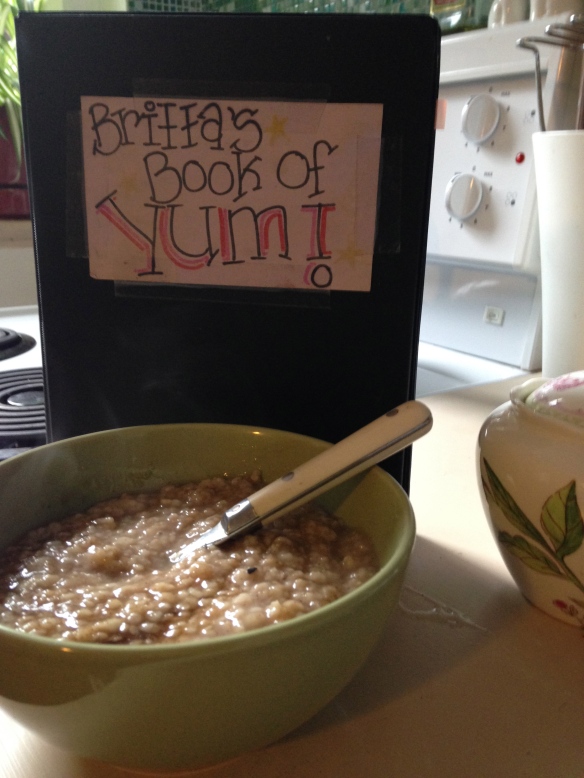
kbb_book_of_yum

When I went away to university it was the first time I had been away from home. I wasn’t sure what to expect: would I love the freedom? Would I totally freak out? Either way I knew that I was going to be really homesick.

My solution was The Book of Yum and it started out as kind of a joke between my university friends and I.

In anticipation of missing my mom’s cooking, I painstakingly wrote out some of our family’s favorite recipes in a small black binder, organized using homemade construction paper dividers. Also included were some helpful cooking hints for myself on how to make the basics; for example, tips on making rice nice and fluffy, and how to make your basic white sauce. I was reluctant to call it a recipe binder because it felt more like a compendium of my mother’s advice, and a piece of my family’s culinary history. So I called it “The Book of Yum”, made some dorky labels for it and took it to college with me.

Anyone who has had roommates knows that it’s hard to keep a secret from them, so it didn’t take long before people started to take note of the little binder I was always toting into the kitchen with me. Maybe it was the colorful labels, or the fact that no one I knew had completed a similar project.

Mostly I think The Book of Yum caught people’s attention because I was one of the few people in my group of friends that could actually cook. And bake.

This was the start of a whole new college culinary adventure. While a lot of kids were out partying you could often find me at home with my roommates attempting to develop a garnish for fish, bake a pie from scratch, or experiment with a foreign food. (Ok, maybe I found some time for partying too.)

In some ways, it was my college years that fostered my love of cooking and food. I tried every kind of food, in every kind of restaurant in town and I always had a hungry mouth nearby willing to try whatever it was I was making that day. It was a time of firsts: my first pastry dough, my first experiment with phyllo, and my first roast.

It was also during these years that I discovered how cooking for others felt like a gift more to myself than a gift for them. Nothing gave me more pleasure than watching my friends enjoy something I had created and nothing made me appreciate food more than the act of making it myself.

More than anything, though, The Book of Yum was a way for me to honor my family; both my love for them and the traditions that we build and maintain.

I still have it too, even though it’s expanded to accommodate my expanded culinary horizons. Even though that little black binder has transformed, it still opens a floodgate of sense memories as soon as I lift the cover. No matter how successful I end up being in my writing career, I’ll still consider one of my favorite books that I’ve written.

You may not know it, but you’ve read part of The Book of Yum too! If you were looking at it now, you’d recognize these Chocolate Brownies, these Butterscotch Brownies, these Banana Muffins, these Chocolate Banana Cookies, these Sugar Cookies, these Maple Syrup Muffins, this Apple Pie and this Zucchini Bread. I hope you enjoyed them as much as my family and friends have!

KBwB-BFlower-50I’d love to hear about your own recipe collection. Which childhood recipes do you still include in your repertoire? Email me at keepingbusyb@gmail.com or comment below. I’d love to try one out!

I try out a new recipe every two weeks or so and blog about the results, so if you need even more baking inspiration, you can find the complete list in alphabetical order here.


Your Burning Baking Questions for B

kbb-in-the-kitchen

If you’re new to this blog, welcome! I love meeting new people who love baking as much as I do.

If you’ve been following for awhile, you’ll know that in addition to having a giant sweet-tooth, part of my passion for baking lies comes from how I cope with stress. But I get a lot of questions about my favorite recipes, methods and my baking experiences both online and in person, so I thought I’d attempt to answer a few more of them here. Maybe we can even get to know each other a little better!

What was the first thing you ever made? Some of my earliest memories are of helping my mother in the kitchen but the first thing I ever baked all by myself were these chocolate brownies.

Are there any recipes you know off by heart? Yeah, that one! And the one for peanut butter cookies because it’s so freaking easy.

What’s the easiest thing you’ve made? I’d say pretty much all of the stuff I’ve featured on the blog is pretty easy (otherwise I wouldn’t blog about it!) but these peanut butter cookies, this peach cobbler, these minty Nanaimo bars, these butterscotch treats, and these S’mores Squares were among the easiest. Oh! And applesauce, although I don’t think that really counts as “baking”.

What’s the most difficult thing you’ve made? Making your own pastry dough like I describe here is pretty labor-intensive. If you’ve never baked anything before, it’s probably not the best recipe to start with but mostly I think it’s just all of the steps that make it intimidating.

Where do you get your inspiration from? I read lots of cookbooks (found here and here), but I also used to collect magazine clippings like crazy. That was kind of getting out of hand so I’ve relegated a lot of my collection onto Pinterest and into my recipe book. I also read a ton of amazing baking blogs run by talented bloggers, all of whom are way better bakers than I am.

Do you only bake for your blog? Yes and no. Mostly I bake for myself, family, friends or co-workers (especially if there’s a special occasion). I enjoy trying new recipes all the time but since I started featuring more of my baking on the blog I’ve made a more concerted effort to vary the kinds of things I make, and the flavors I use. So yes, sometimes I find a new recipe to try out for the blog specifically, but I’m constantly returning to my favorites in between.

Have you ever considered making baked goods on commission? Are you going to open a bakery? I don’t have my food handler’s certificate, or any formal culinary training so probably not. I kind of like the idea of feeding a bunch of people and getting paid for it, though, so I wouldn’t rule it out.

Do you cook as often as you bake? Not as much, although I do like cooking a lot. I don’t often like eating big meals so I’m more of a grazer throughout the day- fresh fruits and veggies, and yogurt. Oh man, yogurt. I usually save my more substantial recipes for other people. Maybe I’ll share one or two on the blog in the future!

What’s the one thing you haven’t baked? I have yet to successfully make meringue, and as of yet I’ve never attempted a soufflé. (It kind of scares me.) I’ve also never made a cheesecake- no particular reason, I just haven’t done it yet!

What is your all-time favorite dessert? There haven’t been many baked goods that I’ve met and haven’t liked, but there’s nothing like a dense, moist carrot cake with cream cheese frosting.

KBwB-BFlower-50

I hope you’ve enjoyed getting the chance to know me a little bit more- now I want to know a little bit more about you! What’s your favorite dessert? What’s the one recipe you’ve always been too intimidated to bake? Leave your answers below, and make sure to link to your favorite recipes on your blog! When it comes to baking, the more the merrier.

Baking with B: Classic Chocolate Fudge

Everyone should know how to make chocolate fudge, everyone, because it’s one of those recipes that seems way harder than it actually seems. All of your friends will be impressed by your super-awesome candy-making skills and you’ll get the satisfaction of knowing you made a sweet treat in less time then it will take you to burn off the calories from one piece.

Classic Chocolate Fudge (makes 64 squares)

500 g. (about 3 ½ c.) best quality dark, milk or white chocolate, coarsely chopped

300 mL can sweetened condensed milk

Line the bottom and sides of a 8×8-inch pan with 2 overlapping pieces of plastic wrap, letting wrap half over sides of pan. Combine chocolate and milk a large microwave-safe bowl. Microwave, uncovered, on medium setting halfway through until chocolate is almost melted, 3-4 minutes. Remove and stir until evenly mixed and smooth. Scrape mixture into prepared pan and press down, smoothing top. Fold overhanging ends of plastic wrap over fudge to completely cover. Refrigerate at least 2 hours or overnight. Fudge keeps well, refrigerated, for up to 1 week.

Happy baking!

B

KBwB-BFlower-50Baking with B appears every other Monday on the Keeping Busy with B Blog. Find out why I like baking so much here. For more of my baking, click here. And for even more recipe inspiration, check out my Pinterest full of food eye candy that will have you licking your computer. Promise.

Baking with B: Best-Ever Bran Muffins

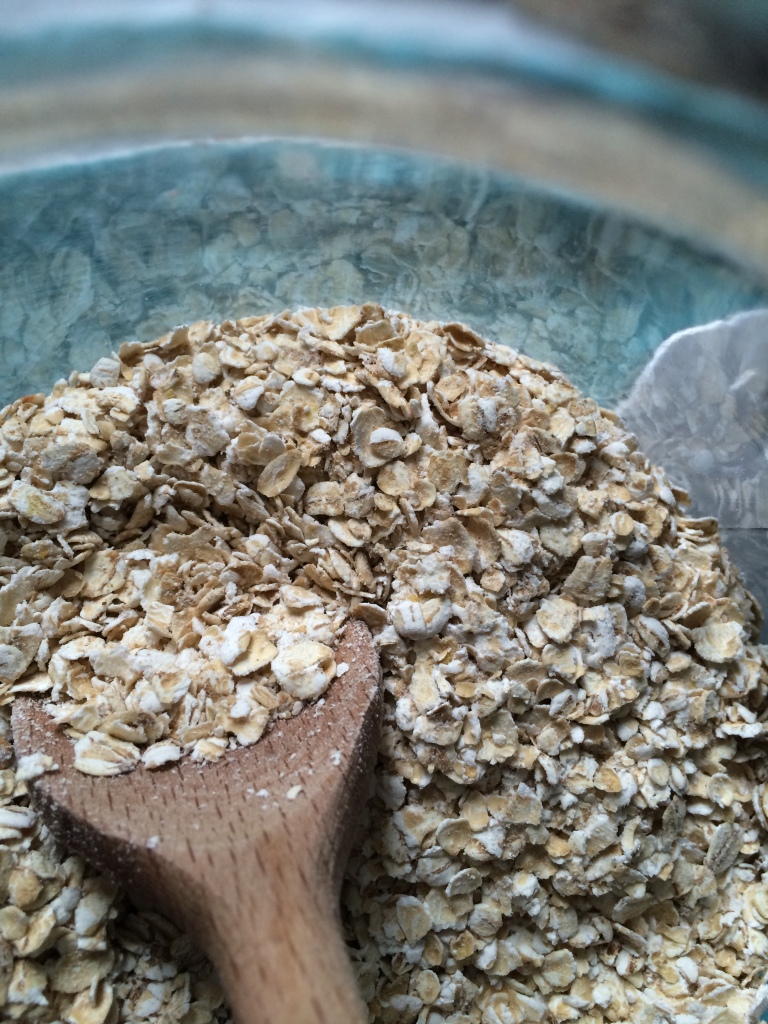
KBB_baking_bran_muffins Days like these when the sun is bright and the weather is warm it’s too tempting to go outside instead of staying indoors and doing something boring like eating breakfasts. In the mornings when I’m feeling like I want to go, go, go it’s great to have these around to take to the library, to work or even for a snack on a particularly long dog walk. Don’t limit yourself to this basic recipe either- make it your own with dried or fresh fruits, nuts, seeds, chocolate chips, peanut butter, cream cheese, etc. The list goes on and on, like these endless early summer nights.
Bran Muffins (makes 12)

1 1/2 c. wheat bran

1 c. buttermilk

1/3 c. vegetable oil

1 egg

2/3 c. brown sugar

1/2 tsp vanilla extract

1 c. all-purpose flour

1 tsp baking soda

1 tsp baking powder

1/2 tsp salt

1/2 c. raisins

Preheat oven to 375F. Grease muffin cups or line with paper muffin liners. Mix together wheat bran and buttermilk and let stand for 10 minutes. In a separate bowl, beat together oil, egg, sugar and vanilla. Add to the buttermilk/bran mixture. Sift together dry ingredients, then stir flour mixture into buttermilk mixture, until just blended. Fold in raisins and spoon batter into prepared muffin tins. Bake for 15 to 20 minutes, or until a toothpick inserted into the center of a muffin comes out clean.

Happy baking!

B

KBwB-BFlower-50Baking with B appears every other Monday on the Keeping Busy with B Blog. Find out why I like baking so much here. For more of my baking, click here. And for even more recipe inspiration, check out my Pinterest full of food eye candy that will have you licking your computer. Promise.

Baking with B: The Deconstructed Peanut Butter Cookie

BFoodPix-PBCookies-1500

Oh man. My mom used to make these all the time when I was little. I hadn’t had them in forever, and then there was all this peanut butter in the house- needless to say, revisiting this recipe was long overdue.

Lately, I’ve been reading so many recipes that are junked-up versions of old favorites which is why I call this the “deconstructed” version of a peanut butter cookie. It’s just that- three ingredients, plain and simple, not too sweet and super peanut-y good.

The Deconstructed Peanut Butter Cookie (makes 24)

1 c. unsweetened, smooth peanut butter

1/2 c. brown sugar

1 egg, beaten

Preheat oven to 325F. In a medium bowl, cream sugar and peanut butter until well blended. Mix in egg until batter starts forming a smooth, sticky ball. Scooping out portions by the spoonful, roll batter into balls and place approximately 2 inches apart on tray. Flatten with criss-cross patterns using the tines of a fork.

B’s Tip: To make sure you have a clean criss-cross pattern, have a glass of cold water handy so that when your fork gets too sticky you can dip it in and clean away some of the excess.

Bake for 15 minutes. Do not overbake. Cookies will look soft and puffy when they first come out of the oven, but will harden once you leave to cool on the baking tray for 5 minutes. Remove to wire racks and let cool completely before serving.

Now just because I call this the “deconstructed” peanut butter cookie doesn’t mean you can’t make of the recipe what you will. You may want to experiment with different flavors of nuts, or adding chocolate or butterscotch chips for a hint of sweetness. Or why not try something daring, like mixing in dried fruit, shredded coconut, or broken pretzel pieces? These cookies are super crumbly and buttery and would also taste great by themselves sprinkled over ice cream, or even on top of a cake.

Who says you can’t play with your food?

KBwB-BFlower-50

Baking with B appears every other Monday on the Keeping Busy with B Blog. Find out why I like baking so much here. For more of my baking, click here. And for even more recipe inspiration, check out my Pinterest full of food eye candy that will have you licking your computer. Promise.

Baking with B: Classic Pecan Pie

I have this theory that we date the same people over and over again. Some attribute this phenomenon to a psychological need to look for partners that emulate our parents, but I’m convinced that there are also certain things that attract us to certain people, and make us attractive to others in turn. For example, I inexplicably keep on finding these guys who list pecan pie at the top of their favorite desserts and it is for this reason that I have made this pie more than any other. Go figure.

Classic Pecan Pie

3 eggs, slightly beaten

1/2 c. brown or white sugar

1/4 tsp salt

1 c. light corn syrup

1/2 tsp vanilla

1 c. pecans, broken in pieces

Set the oven at 450F. Line a 9″ pie pan with your preferred kind of pastry (I have a recipe on how to make a traditional pie crust here; however, for this recipe I would recommend using something more like a pressed graham-cracker crust. You can make it yourself or find them pre-packaged at the grocery store.) Mix ingredients and pour into pan. Bake for 10 minutes. Reduce heat to 350F and bake 35 minutes longer. Chill. Serve with whipped cream and halved pecans for garnish. (Because yum.)

Happy baking!

B

KBwB-BFlower-50

Baking with B appears every other Monday on the Keeping Busy with B Blog. Find out why I like baking so much here. For more of my baking, click here. And for even more recipe inspiration, check out my Pinterest full of food eye candy that will have you licking your computer. Promise.

Baking with B: Date Squares

IMG_0440

Let’s make a date, shall we, for some mid-winter treats that serve up a nice hit of sweetness without being too unhealthy. When you combine dates with oats and pecans it’s practically like granola, which means I’m totally allowed to eat these for breakfast, right? Right? I dare you not to eat them as a meal, either.

Date Squares (serves 12)

1 1/2 c. chopped, pitted dates

1/4 c. granulated sugar

1 c. orange juice

1 tsp grated orange zest

1 1/4 c. quick-cooking oats

1 c. all-purpose flour

3/4 c. packed brown sugar

1/4 c. chopped toasted pecans

1 tsp ground cinnamon

1/2 c. vegetable oil

1/4 c. water

Preheat the oven to 350F. Combine dates, sugar and orange juice in a saucepan and bring to a boil. Reduce heat to medium and let simmer for 15 minutes, or until the dates are soft and the liquid is absorbed. Mash the mixture and set aside to cool. Meanwhile, combine orange zest, oats, flour, brown sugar, pecans, cinnamon, oil and water in a bowl until combined. Pat half of the mixture onto the bottom of a greased 8″ square baking dish. Spread the cooled date mixture over top. Sprinkle the remaining oat mixture on top of the dates for the third layer. Bake in center of the oven for 25 minutes or until squares are golden. Cool before serving.

B’s Tip: Who doesn’t like pecans? Ok, maybe you’re actually one of these crazy people that doesn’t. This recipe can still be salvaged. I’d be willing to substitute for walnuts, or maybe almonds. It’s too hard to decide! Your squares, your choice, and let me know how it works for you.

Happy baking!

B

KBwB-BFlower-50Baking with B appears every other Monday on the Keeping Busy with B Blog. Find out why I like baking so much here. For more of my baking, click here. And for even more recipe inspiration, check out my Pinterest full of food eye candy that will have you licking your computer. Promise.


Baking with B: Classic Plum Pie

KBB_baking_plum_pieI guess it’s that time of year again where it starts to feel like fall and I’m all about the pie, as evidenced in this whopper of a recipe post here.

So while I’m in the mood for pie I thought I’d share my makeshift recipe for plum pie. It’s a revival from Thanksgiving a couple of years back when I decided that seeing as my family doesn’t really celebrate Thanksgiving (both of my parents come from European families) the most logical thing to do was to concoct an elaborate meal complete with this fancy-looking dessert.

I say fancy-looking because pie always looks fancy, but notice I didn’t say hard. Once you get the hang of making your own crust (see the recipe on how to make one from scratch here) your biggest dilemma is going to be figuring out what you want to fill your pie with. Or take the easy way out and just fill your favorite store-bought pie crust with this tasty filling. Go ahead. No one is judging you.

Perfect Plum Pie (serves 8)

Crust:

Recipe for homemade pie crust here or use store-bought

Filling:

¾ c. packed brown sugar

3 tbsp cornstarch

1/8 tsp salt

12 large plums, sliced

1 tbsp fresh grated ginger

1 tbsp cold unsalted butter, cubed

B’s Baking Tip: If you’re using my homemade pie crust recipe, follow the instructions as listed here to make the crust. If you’re using store-bought, use the guidelines on the package to prep and cook your pie crust.

To make the filling, combine brown sugar with cornstarch and salt in a large bowl. Stir in plums and ginger until evenly coated. Distribute fruit mixture evenly along bottom of pie dish. Top with cubes of butter. Bake in lower third of oven until crust is golden and plums are tender, about 35-45 minutes.

Happy baking!

B

KBwB-Flower-50

Baking with B appears every other Monday on the Keeping Busy with B Blog. Find out why I like baking so much here. For more of my baking, click here. And for even more recipe inspiration, check out my Pinterest full of food eye candy that will have you licking your computer. Promise.